AI character creation is the art of breathing life into a digital being, using nothing but carefully chosen words to guide an artificial intelligence. It's where your artistic vision meets the raw power of prompt engineering, letting you conjure everything from hyper-realistic portraits to epic fantasy heroes in the blink of an eye.
Crafting Your Character's Core Identity
Before you even think about writing a prompt, the real work begins. This initial planning stage is what separates a generic AI-generated face from a character that feels alive and consistent. If you rush this part, you're setting yourself up for a world of frustrating, mismatched results.
Develop a Detailed Character Sheet
Think of this as the soul of your character—a blueprint for the AI. A solid character sheet goes way beyond just listing "brown hair" or "blue eyes." You need to define the very essence of who this person is, giving the AI a rich well of details to pull from.
Your sheet should dig into:
- Core Personality: Are they a stoic guardian or a mischievous rogue? Use evocative words like pensive, cynical, exuberant, or intimidating.
- Motivations and Goals: What gets them out of bed in the morning? A knight fighting for redemption carries himself very differently from one chasing glory.
- Backstory Snippets: A former street urchin who clawed their way to nobility will wear fine clothes with a different posture than someone born into it. These details shape expression and stance.
- Defining Quirks: Do they have a nervous tic, a distinctive scar, or a signature smirk? These are the little things that make a character feel grounded and real.
A well-defined personality is your most powerful tool for consistency. An AI can more easily replicate the "weary expression of a veteran soldier" than just "a sad man" across multiple images.
This level of detail isn't just for novelists; it's a practical must-have for effective ai character creation. When you have a crystal-clear identity in mind, your prompts become laser-focused, and your results become far more predictable. This groundwork is especially critical for bigger projects, and you can see more on applying these techniques in our guide on AI for game development.
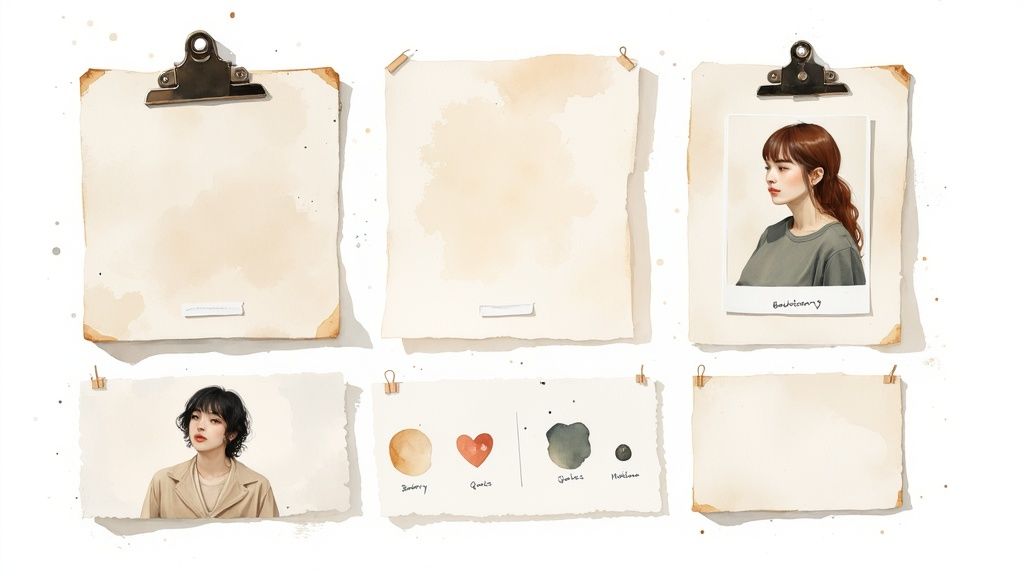
Build a Visual Mood Board
If the character sheet defines who they are, the mood board defines how they look. This is your creative compass. Start gathering a collection of images that nail the exact aesthetic you're chasing. The goal isn't to copy a specific face, but to build a collage of pure inspiration.
Your mood board is the place to pin down:
- Art Style: Are you going for gritty cyberpunk, a soft watercolor illustration, or stark photorealism? Collect examples.
- Clothing and Accessories: Find pictures of the exact style of armor, jacket, or jewelry you envision.
- Color Palette: What colors define your character and their world? Is it all muted earth tones or vibrant neons?
- Atmosphere and Lighting: Grab screenshots with the kind of lighting you want, like dramatic chiaroscuro from a film noir or the soft, diffused sunlight of a fantasy meadow.
Doing this prep work gives you a ready-made library of keywords and a clear visual target. It saves you from endless, frustrating trial-and-error and ensures your creative vision is what drives the AI from the very first prompt.
Writing Prompts That Actually Work
This is where all that careful planning gets turned into direct instructions for the AI. We're moving way beyond basic phrases like "fantasy knight." The goal here is to build a powerful, modular prompt that gives you consistent, high-quality characters right from the very first click.
The real secret to great AI character creation is specificity. A vague idea will always get you a vague image. But a detailed set of instructions? That acts like a professional creative brief for your AI partner.
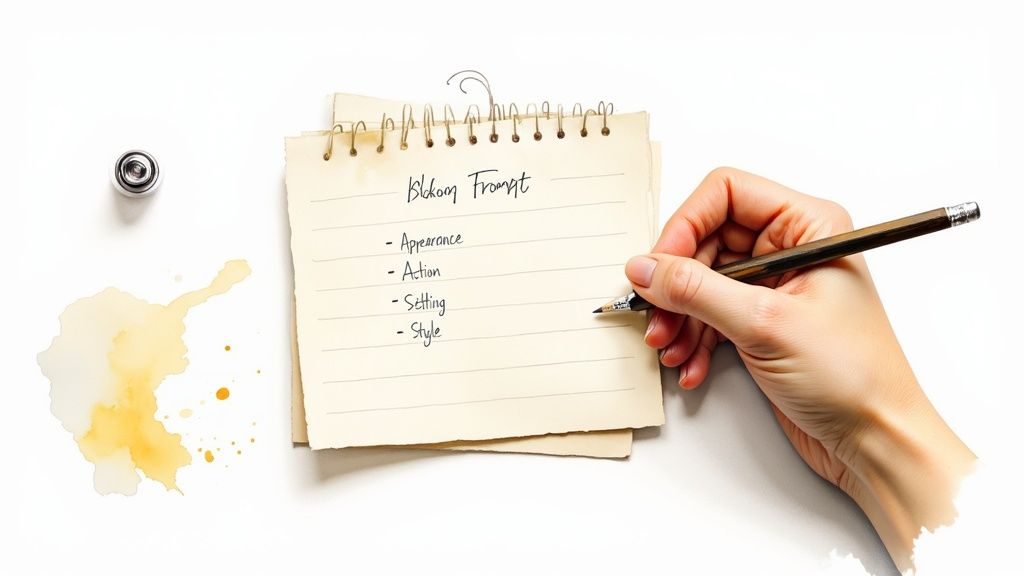
The Anatomy of a Powerful Prompt
Through countless generations, I've found that a structured, almost modular, approach to prompting works best. Instead of just mashing a bunch of keywords together, you should think of it as building your character layer by layer. This method gives you a repeatable template you can easily tweak for any new concept.
My go-to structure breaks down like this:
- [Subject]: Nail down the core identity first. This could be anything from a grizzled cyberpunk detective to a graceful elven enchantress or even a cheerful robot botanist.
- [Appearance Details]: Now, layer on the specific traits from your character sheet. Think wearing a worn leather trench coat, with piercing cybernetic eyes, and a subtle, knowing smirk.
- [Action/Pose]: Breathe some life into the character. Are they leaning against a rain-slicked alley wall? Or maybe they are casting a glowing spell with hands outstretched? This gives the scene context.
- [Setting]: Ground your character in an environment. A setting like a neon-drenched Tokyo street at night or a sun-dappled ancient forest completely changes the mood.
- [Style Modifiers]: Finally, define the overall look and feel. Add terms like photorealistic, cinematic lighting, 8k resolution, dramatic chiaroscuro, or watercolor illustration style.
Using this layered approach makes troubleshooting a breeze. If the lighting feels off, you just have to adjust the style modifiers—not rewrite the entire prompt from scratch.
Mastering Keywords and Modifiers
The right keywords can completely transform an image's quality and mood. You have to act like a director, telling the AI exactly what kind of lighting, emotion, and camera shot you're after.
The explosion of AI companions shows just how much people love creating detailed digital personalities. The AI character chat market recently hit $120 million in revenue, with users on platforms like Character.AI designing over 18 million unique characters. This boom proves there's a huge appetite for bringing these concepts to life. You can read more about the growth of AI character platforms and their statistics.
To really get the most from your prompts, I recommend building a personal library of your favorite modifiers. Here’s a quick breakdown of some essential categories I use all the time to add precision and control.
Key Prompt Modifiers for Character Creation
A great prompt is more than just the subject; it's the combination of specific details that bring it to life. This table breaks down some of the most impactful modifier categories you can use to direct the AI with greater precision.
| Modifier Category | Description | Example Keywords |
|---|---|---|
| Facial Expression | Dictates the character's mood and personality. | pensive gaze, subtle smirk, look of fierce determination, joyful laugh |
| Lighting | Controls the atmosphere and visual drama of the scene. | soft golden hour light, dramatic chiaroscuro, neon rim lighting, cinematic volumetric lighting |
| Composition | Sets up the virtual camera shot for your character. | full body shot, dynamic action pose, extreme close-up portrait, dutch angle |
| Artistic Style | Defines the overall aesthetic of the final image. | hyperrealistic, digital painting, anime key visual, concept art, Unreal Engine 5 |
Mastering these keywords will give you a level of control that feels less like rolling the dice and more like directing a photoshoot.
The Power of Negative Prompts
Telling the AI what you want is only half the battle. Telling it what you don't want is where you really start to refine your results. This is where negative prompts come in. Think of them as your personal quality control filter, helping you eliminate common AI art problems before they even show up.
Use negative prompts to steer the AI away from things like:
- Common Artifacts: deformed hands, extra fingers, mutated, blurry, grainy
- Unwanted Styles: cartoon, sketch, watermark, signature, text
- Distracting Elements: crowd, cluttered background, ugly, tiling
When you combine a detailed positive prompt with a strategic negative one, you gain an incredible amount of control. This dramatically increases your odds of getting a stunning, usable character image on the very first try.
How to Nail Down a Consistent AI Character
It’s one thing to generate a stunning character in a single go. That's the easy part. The real magic—and the real challenge—is bringing that exact same character back again in a different pose, a new outfit, or another scene.
Without a solid game plan, you’ll end up with a folder full of slightly-off lookalikes instead of one recognizable person. This is where the true craft of AI character creation begins, moving past one-off images to build a real visual story.
And it’s a skill in high demand. The AI avatar market is expected to rocket from $0.80 billion this year to a staggering $5.93 billion by 2032. This boom shows a massive appetite for persistent, recognizable digital people.
Whether you're crafting a hero for a graphic novel or a face for a marketing campaign, mastering these techniques is non-negotiable.
Using Seed Numbers for a Stable Foundation
One of the simplest tricks in the book is using a seed number. Think of the seed as a unique starting code for the AI's random-number generator. If you use the same prompt and the same seed, the AI will often recreate the image’s core composition, color scheme, and overall vibe with surprising accuracy.
Now, it’s not a magic bullet for facial replication, especially if you start changing other parts of the prompt. But it gives you a stable canvas to work from. A consistent seed is perfect when you want your character in the same basic setting but with a minor tweak, like a different expression or a subtle shift in posture.
Image-to-Image: Your Best Friend for Facial Lock-In
For serious control over your character's face and features, image-to-image (img2img) is the technique I rely on most. It’s exactly what it sounds like: you upload a great character portrait you've already made and use it as a direct visual guide for the next generation. The AI studies that reference and does its best to match the structure, colors, and key features.
Here's a workflow that just plain works:
- Generate the "Golden" Headshot: Your first step is to create one perfect, clean, well-lit portrait. This is your master reference. Make sure the facial features are crystal clear.
- Upload It: Take that master image and feed it into your AI tool's img2img function.
- Prompt the New Scene: Now, write a new prompt describing what you want next. Something like, "Full-body shot of the character standing on a rainy cyberpunk street."
- Tweak the Strength: Most tools have a "strength" or "denoising" slider. A low value (say, 0.4-0.6) forces the AI to stick very closely to your uploaded face. A higher value gives it more room to get creative. Start low to keep that facial consistency locked in.
This method is an absolute game-changer for creating character sheets that show the same person from different angles or in different clothes. If you want to go deeper, there are great resources on using a consistent character AI image generator to really master this process.
Inpainting for Surgical Strikes
You've been there. The image is 99% perfect, but one tiny detail is driving you crazy. Maybe it’s a weirdly bent finger, a stray wisp of hair, or eyes that are the wrong color. Regenerating the whole thing is a gamble you don't want to take.
This is where inpainting comes in.
Inpainting is your secret weapon for making targeted fixes. You select a specific area of an image and tell the AI to regenerate only that part, leaving everything else untouched. It’s like a smart eraser that fills in the blanks based on your new instructions.
Let's say your character looks perfect, but the AI gave them blue eyes when they should be green. Just mask over the eyes, type "green eyes" in the inpainting prompt, and let the AI perform microsurgery. It’s a massive time-saver and absolutely essential for polishing your final images without losing what makes them great.
A Workflow for Refining Your Character
Let's be real: your first attempt at creating an AI character almost never nails it. True mastery isn't about crafting one flawless prompt from the get-go. It’s about getting into a rhythm of iterative refinement—a creative loop where you analyze what the AI gives you, figure out what works, and tweak your approach until the character on the screen finally matches the one in your head.
Think of it as a process of diagnosis and adjustment. Did the lighting come out looking flat and harsh? Time to adjust your style modifiers with phrases like dramatic rim lighting or soft, diffused light. Is your character’s expression just a little off? Get more specific. Swap out a generic smiling for a more nuanced a subtle, knowing smirk. Every small change is another step closer to your vision.
Iteration and Batch Generation
Once you’ve dialed in a base prompt that consistently captures the vibe of your character, you can start building out variations. Instead of going back to square one for every new scene, you can lean on batch generation to create a whole library of assets much more efficiently. This just means running that same core prompt with small, targeted changes.
You can whip up batches to explore things like:
- Emotional Range: Swap out the expression to see your character looking
pensive,joyful, ordetermined. - Wardrobe Changes: Keep the face and setting the same but change the clothing from
wearing a leather jackettowearing a formal tuxedo. - Different Poses: Adjust the action part of your prompt to see the character
sitting at a desk,running through a forest, orlooking over their shoulder.
This is an incredibly powerful way to flesh out a full character sheet or generate a bunch of assets for a story. You get to keep the character's core identity locked in while exploring how they appear in completely different contexts.
Think of refinement as a conversation with the AI. Your first prompt is the opening line. The image it returns is its response. Your next, slightly adjusted prompt is your reply, clarifying what you meant.
To keep things consistent during this back-and-forth, you need a workflow you can repeat. The flowchart below breaks down a simple but effective process for locking in your character's appearance using a few key techniques.
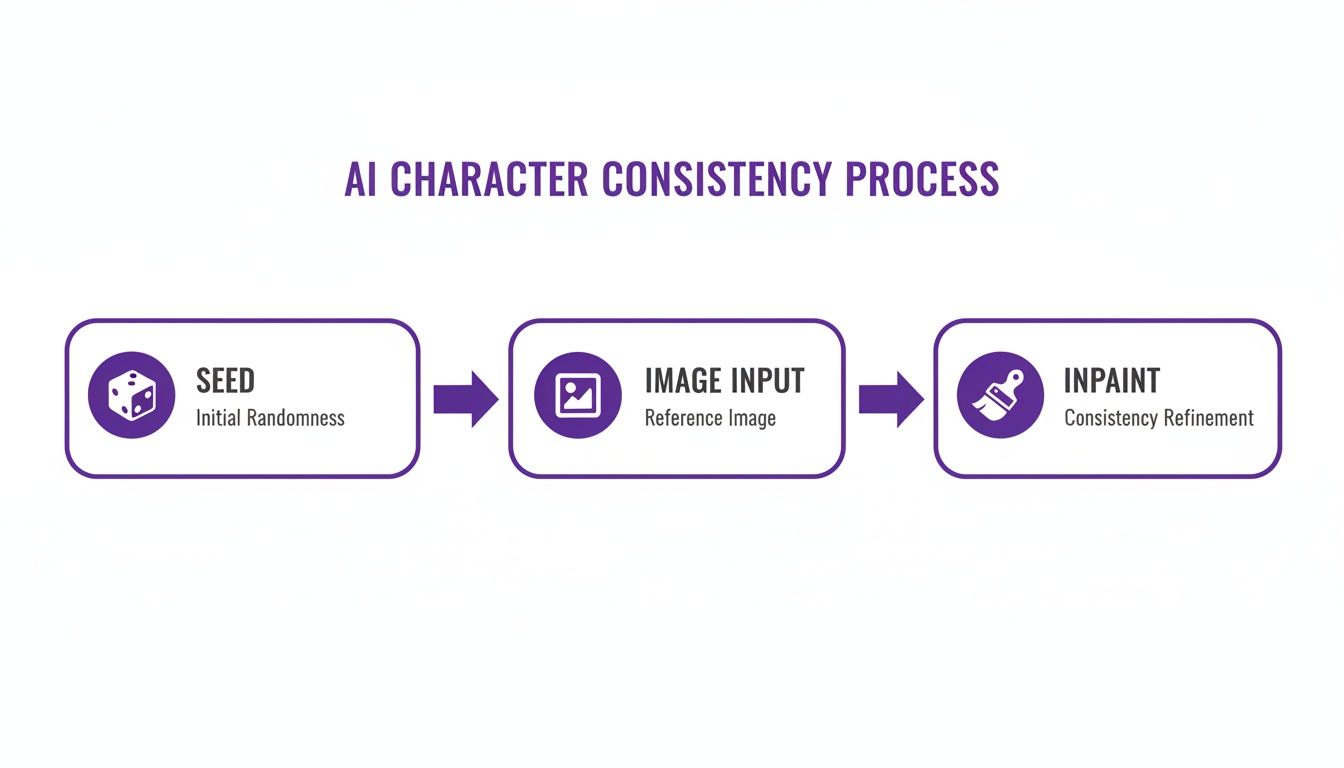
This visual guide shows how using a stable seed, a strong reference image, and targeted inpainting creates a reliable system for refinement. For creators looking to make this even easier, you can explore a dedicated AI character generator, which often builds these features into a more intuitive interface. By following this loop, you move from random chance to deliberate creation.
Finalizing and Using Your Creations
You’ve gone through the creative grind, tweaking and refining until your character is just right. Now comes the exciting part: getting it ready for the real world. This is the final bridge between your digital concept and a tangible asset you can drop into a website, a game, or a new marketing campaign.
First up, the practical stuff. Exporting your image correctly is a small step that makes a huge difference.
If you need your character to have a transparent background—which is perfect for layering onto other graphics or videos—then PNG is the only way to go. For just about anything else, especially web use where file size is a priority, a well-optimized JPG is your best bet.
Upscaling and Commercial Rights
Often, the default resolution you get from an AI generator is fine for a quick preview, but it won't cut it for high-quality prints or big-screen displays. This is where AI upscaling tools come in. These tools intelligently increase your image's pixel count, sharpening details and getting your character ready for high-definition use without turning it into a blurry mess.
But before you go any further, there’s one critical step you can't afford to skip: understanding the commercial rights. This isn't just a friendly suggestion; it’s essential for avoiding some serious legal headaches down the road.
Never assume you have the right to use an AI-generated character commercially. The platform's Terms of Service is the ultimate authority, and it can vary dramatically between different tools and subscription tiers.
Most reputable services, like AI Media Studio, are crystal clear about what you can and can't do. Paid plans almost always grant you full commercial rights, giving you the freedom to use your characters in for-profit projects. Always take a minute to read the fine print and confirm your ownership and usage permissions. That simple check protects both you and your work. For a more direct path, you can see how an AI avatar generator can simplify the whole creation and export workflow.
Bringing Your Character to Life
A static image is great, but giving your character a voice can take engagement to a whole new level. To really make your AI creations pop, think about how you can unleash AI character voices for dynamic interactions in videos, games, or other digital experiences.
When you pair a strong visual with a fitting voice, you create a complete personality that people will remember. It’s that final layer of polish that transforms your image from a simple graphic into a character with a real presence.
Answering Your AI Character Creation Questions
As you get deeper into generating characters, you're bound to hit a few common snags. It happens to everyone. Here are some of the questions I see pop up most often, along with some straightforward, practical advice to get you moving again.
How Do I Keep My Character's Face Consistent?
This is the big one, isn't it? Getting the same face twice can feel like winning the lottery, but there's a method to the madness. The most reliable approach is a combination of a consistent seed number and the power of image-to-image prompting.
First, generate one perfect headshot. This is your anchor, the image that nails the look you're after. From now on, you'll use this headshot as a direct visual guide for every other image you create. Keep the parts of your prompt describing the face exactly the same, but feel free to swap out everything else—clothing, poses, backgrounds, you name it.
Some of the more advanced tools are also rolling out features like a "character lock" or the ability to train a small, custom model (often called a LoRA) on your character's face. These can give you nearly flawless consistency.
Can I Legally Use AI Characters in Commercial Projects?
The short answer is a firm "it depends," and it all comes down to the terms of service of the AI tool you're using. Many platforms, like Midjourney, offer specific subscription tiers that explicitly grant you full commercial rights to the images you create.
It's absolutely critical to read the fine print. Copyright law around AI art is still a bit of a wild west, and the platform's terms are your clearest guide. Assuming you have the rights without double-checking could land you in hot water later.
As a general rule, if you're on a paid plan that says it includes commercial rights, you should be clear to use your creations in for-profit projects. Always, always verify before you publish.
What Are the Best AI Tools for Character Creation?
The "best" tool really depends on what you're trying to accomplish. Each of the big players has its own personality and strengths.
- Midjourney: Often seen as the go-to for photorealistic or highly artistic character styles. Its aesthetic engine is powerful and has a very distinct, polished look right out of the box.
- Stable Diffusion: This is the platform for creators who crave maximum control. With features like inpainting, outpainting, and the ability to use thousands of custom models, the possibilities are nearly endless.
- DALL-E 3: Fantastic for its ease of use and slick integration with tools like ChatGPT. It’s incredibly user-friendly and great for getting ideas down quickly.
Beyond these, new and specialized apps are popping up all the time, many focusing specifically on niche styles like anime or cartoons.
How Do I Fix Common Problems Like Mangled Hands?
Ah, the classic AI art problem: mangled hands. It’s a rite of passage, but thankfully, it's fixable. The best solution is twofold.
First, be proactive with your negative prompts. Adding terms like deformed hands, extra fingers, mutated hands, poorly drawn hands can dramatically cut down on the issue from the start.
Second, for an image that is otherwise perfect, inpainting is your best friend. This feature lets you draw a mask over just the hand area and regenerate only that part with a more targeted prompt, like a perfectly formed human hand resting on a table. It might take a couple of attempts, but this focused approach is the most reliable way to clean things up.
Ready to create stunning, high-quality characters without the frustration? With over 50 art styles and intuitive tools, AI Media Studio gives you everything you need to bring your vision to life in seconds. Start creating for free today.