Generating AI art is really about translating your ideas into striking visuals, and it boils down to a few simple actions: writing a clear text prompt, picking an impactful style, and letting the AI do its magic. This whole process, supercharged by intuitive platforms, has thrown the doors wide open for anyone to create professional-grade images.
Your Starting Point for Creating AI Art
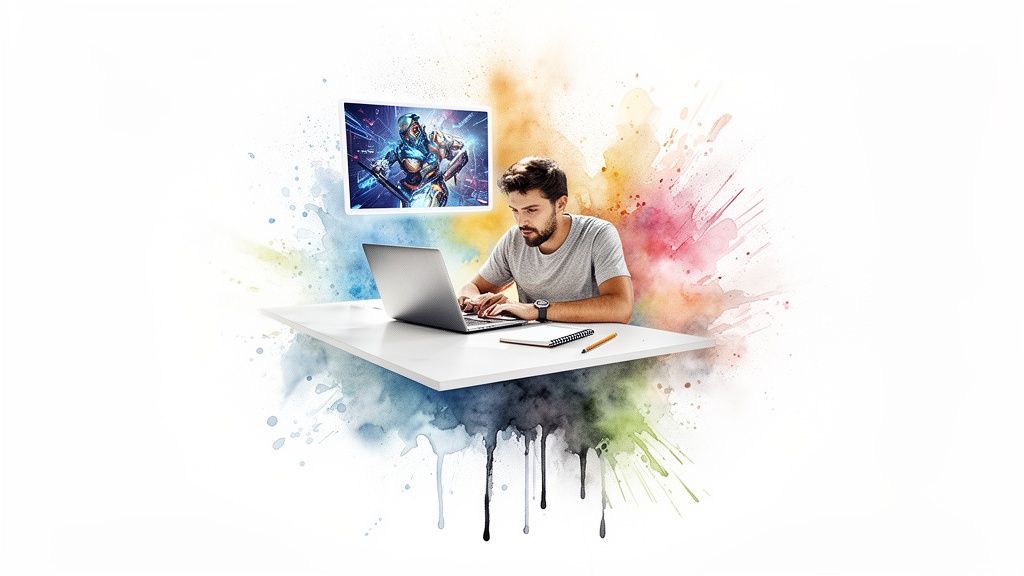
The knack for creating incredible AI art is no longer some niche skill reserved for tech wizards. It’s become a go-to tool for marketers, bloggers, and artists who need to churn out high-quality visuals on a deadline. Instead of wrestling with complex design software for hours, you can bring an idea to life in just a few minutes.
This shift has been unbelievably fast. What felt like a cool tech experiment back in 2022 is now a daily creative habit for millions. It's staggering, but an estimated 34 million AI-generated images are now created every single day.
Since the major models launched, we've seen over 15 billion AI images pop up globally—a milestone that took traditional photography nearly 150 years to hit. The scale is just massive.
Breaking Down the Creative Process
At its heart, learning how to create AI art is a simple feedback loop: you give an instruction, the AI gives you a result, and you tweak it until it’s perfect. You don’t need a design degree to get started. You just need a clear idea and the patience to experiment.
The entire workflow can be boiled down to a few key moves:
- Craft Your Idea: It all starts with your text prompt. This is your chance to describe the subject, the scene, and the overall vibe you’re going for.
- Pick an Aesthetic: Next, you choose a visual style. Are you aiming for something photorealistic for a new marketing campaign? Or maybe a whimsical watercolor for a blog post?
- Generate and Refine: With one click, the AI builds your image. From there, you can adjust your prompt or use editing tools to dial in the final look.
This straightforward approach is exactly why platforms like AI Media Studio work so well. They do all the heavy technical lifting, letting you stay focused on the purely creative side of things.
The real barrier to creating amazing visuals isn't technical skill anymore—it's the clarity of your vision. Your ability to describe what you want is the most important part of the game.
For a great starting point, exploring resources from creators like lunabloomai can offer a ton of inspiration and practical tools. The goal is to find a generator that clicks with your workflow.
When you pair a great idea with a capable platform, you can produce professional-grade visuals for any project you can dream up. You can check out the different https://www.ai-media-studio.com/tools to see how specific features support this creative cycle.
To get you started even faster, here’s a quick framework that breaks down the process in AI Media Studio. Think of it as your roadmap from idea to finished artwork.
Your AI Media Studio Quickstart Framework
| Phase | Action | Impact on Your Art |
|---|---|---|
| 1. Ideation | Write a detailed text prompt describing your scene and subject. | A clear prompt directly translates into a more accurate and detailed image. |
| 2. Stylization | Browse and select from over 50 pre-set art styles. | This step instantly sets the entire mood and aesthetic of your final piece. |
| 3. Generation | Click the "Generate" button and review the initial results. | The AI interprets your prompt and style to create your first visual draft. |
| 4. Refinement | Tweak your prompt, change the style, or use editing tools to adjust. | This iterative process allows you to perfect the image and align it with your vision. |
This simple four-phase approach demystifies the process, making it easy to jump in and start creating without feeling overwhelmed. It’s all about experimenting and letting the tool bring your imagination to life.
Mastering the Art of the AI Art Prompt
Think of an AI art prompt less like a command and more like a conversation with a brilliant, but very literal, artist. A vague prompt like a robot gets you a generic, forgettable image. But a powerful, well-crafted prompt? That's the secret sauce. It's how you create art that feels intentional, detailed, and completely unique.
Honestly, mastering the prompt is the single most important skill you can develop. The difference is night and day.
The real magic happens when you start layering in details, turning a simple idea into a vivid, breathing scene.
Deconstructing a Powerful Prompt
A truly effective prompt is built from several core components. Instead of just barking a subject at the AI, you guide it by providing context, setting, and artistic direction. It’s like being a director, cinematographer, and set designer all at once, using only your words.
Here are the essential building blocks I always start with:
- The Subject: Who or what is the absolute focus? Get specific. "A robot" is fine, but "a weathered, vintage robot with exposed brass gears" paints a much clearer picture.
- The Action: What is your subject doing? An active subject instantly creates a more dynamic and interesting image. "Tending a garden" tells a story that "standing" just doesn't.
- The Environment: Where is all this happening? The setting is crucial for mood and depth. "In a garden" is a start, but "in a bioluminescent garden at twilight" creates a whole vibe.
When you combine these elements, you're no longer just asking for a picture of a thing; you're describing a moment in time. This layered approach is what separates the basic outputs from stunning, professional-quality visuals.
Adding Artistic Layers for Precision
Once you have your core scene locked in, the next step is to sprinkle in the artistic and technical details. This is where you really take the wheel and tell the AI how you want the image to look and feel. Think about the subtle details you'd notice in a professional photograph or a painting in a gallery.
These artistic layers often fall into a few key categories that can dramatically change your final image.
Lighting Your Scene with Intention
Lighting is probably the most powerful tool you have for setting a mood. Vague terms like "bright" or "dark" won't get you very far. You need to use specific, evocative language to get the AI to cooperate.
- Cinematic Lighting: This is my go-to for a dramatic, movie-like feel with high contrast.
- Soft Morning Glow: Instantly suggests a gentle, warm, and peaceful atmosphere.
- Dramatic Rim Lighting: Outlines your subject with a bright light from behind, making it pop right off the background.
- Neon Glow: Perfect for any cyberpunk or futuristic scene, adding vibrant, electric colors.
Using phrases like these tells the AI not just how to light the subject, but what kind of emotional tone you're aiming for. It’s the difference between a flat, boring image and one that feels alive.
Directing the Camera for Impact
Your virtual camera angle completely changes the viewer's perspective and the story you're telling. Don't let the AI guess—direct it like a filmmaker.
- Drone Shot: A high-angle, overhead view that's great for showing off landscapes and giving a sense of scale.
- Extreme Close-Up: Focuses on a tiny detail, creating a sense of intimacy or tension.
- Wide-Angle Shot: Captures a broad view of the environment, making the scene feel expansive and epic.
- Dutch Angle: Tilts the camera for a disorienting, dynamic effect often used in action or suspense scenes.
Specifying the camera perspective gives you an incredible amount of control over the composition and focus of your final image.
Pro Tip: The real power comes from combining descriptors. An "extreme close-up" of a character's eye with "dramatic rim lighting" will produce a far more compelling result than a simple portrait prompt ever could.
From Simple Idea to Stunning Visual
Let's put this all together with a real-world example. We'll take a generic idea and transform it into a fully realized piece of art by applying the layering principles we've just covered.
The Before Prompt (Generic):
a robot in a garden
This prompt is just too simple. The AI has to make a ton of assumptions about the type of robot, the garden's style, and the overall mood. The result will probably be pretty uninspired.
The After Prompt (Layered and Specific):
A weathered, vintage robot with brass gears, gently tending a bioluminescent garden at twilight. Cinematic lighting, dramatic rim lighting, extreme close-up on the robot's hand holding a glowing flower, photorealistic, 8k.
This revised prompt is a world apart. It provides rich, specific detail at every level:
| Prompt Component | Specific Instruction Given |
|---|---|
| Subject | "weathered, vintage robot with brass gears" |
| Action | "gently tending a bioluminescent garden" |
| Environment | "at twilight" |
| Lighting | "cinematic lighting, dramatic rim lighting" |
| Camera | "extreme close-up on the robot's hand" |
| Style | "photorealistic, 8k" |
This level of detail removes all the guesswork for the AI, letting it generate an image that closely matches the sophisticated vision you have in your head. Mastering this technique is how you create scroll-stopping visuals for social media, captivating blog headers, and unique marketing assets that actually grab attention.
Choosing a Visual Style to Define Your Vision
If the prompt is the ‘what’ of your creation, the visual style is the ‘how.’ It's the artistic lens that brings your text-based idea to life. Honestly, choosing the right style isn't just about what looks cool—it's a strategic move that aligns the mood of your image with the goals of your project.
Think of it like choosing a type of paint for a canvas. Do you need the sharp precision of an oil painting for a product mockup, or are you after the soft, expressive feel of watercolor for a blog header? Each choice tells a completely different story.
This is a critical step in creating AI art that actually resonates with an audience. The style you pick can be the difference between an image that simply illustrates a point and one that sparks a real emotional connection.
Thinking Strategically About Aesthetics
Before you even glance at the style options, ask yourself one simple question: What feeling do I want this image to create?
That question will guide your decision better than endlessly scrolling through a list. For instance, a fintech company would probably lean toward a clean, modern 3D Model style for their website visuals. It conveys precision, professionalism, and forward-thinking tech.
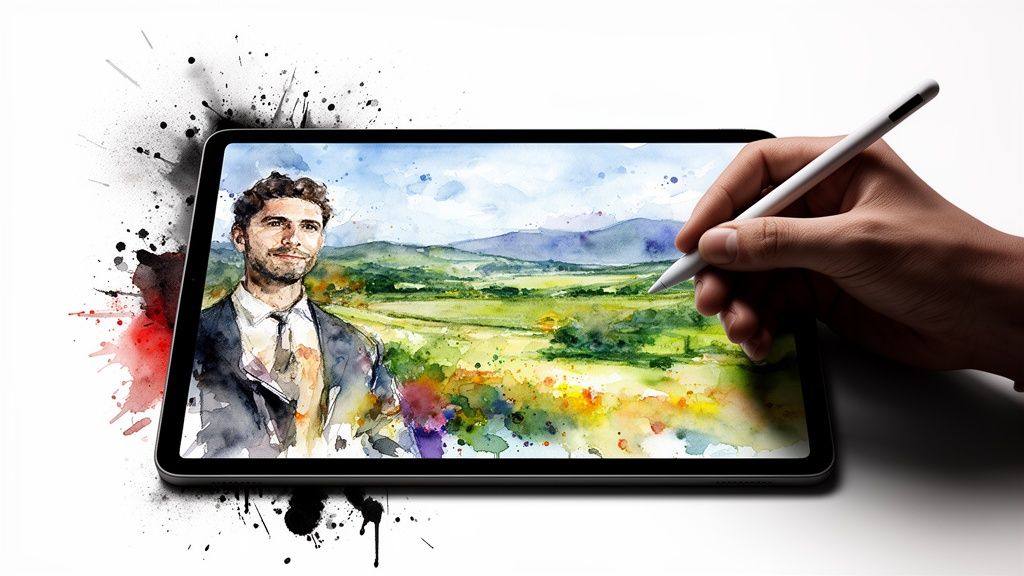
On the other hand, a wellness blogger might pick a Gouache or Watercolor style to create a sense of calm and organic warmth. The goal here is to make a deliberate choice that reinforces your core message. A photorealistic image of a serene beach is nice, but a watercolor rendering of that same beach feels artistic, personal, and curated.
This is where visual storytelling truly kicks in, and it's a massive opportunity for businesses. The global generative AI market for art and design is projected to hit $5 billion by the end of 2025. This isn't just a fun trend; it's a technology that's already dominating major markets. Advertising and marketing account for over 35% of AI art usage, while the visual art sector commands more than 50% of the creative AI space.
The style you choose directly influences how your brand is perceived in this booming visual economy.
A Practical Guide to Popular Styles
The sheer number of styles can feel like a lot at first, but you can simplify things by grouping them by their best use cases. Instead of getting lost in the options, just think about the job your image needs to do.
To help you get started, here’s a quick breakdown of some popular styles in AI Media Studio and when I'd recommend using them:
- Photorealistic: This is my top choice for product mockups, marketing materials, or any time you need the image to look like a real photograph. It builds instant trust and credibility.
- 3D Model: Perfect for creating clean, professional-looking icons, abstract graphics for presentations, or sleek visuals for tech-focused content.
- Cyberpunk: Use this to create a futuristic, high-tech, and edgy vibe. It’s fantastic for social media campaigns or any content related to technology and innovation.
- Vintage: Instantly adds a nostalgic, classic feel. It works wonders for brands that want to evoke tradition, craftsmanship, or a sense of timeless quality.
- Gouache: This style offers a flat, matte, painterly look that feels both artistic and modern. It's excellent for website hero images, blog illustrations, and social media graphics that need a touch of handcrafted charm.
Thinking through a prompt's key components is fundamental to getting the style just right. This visual breaks down how the subject, action, and details form the core of your creative command.
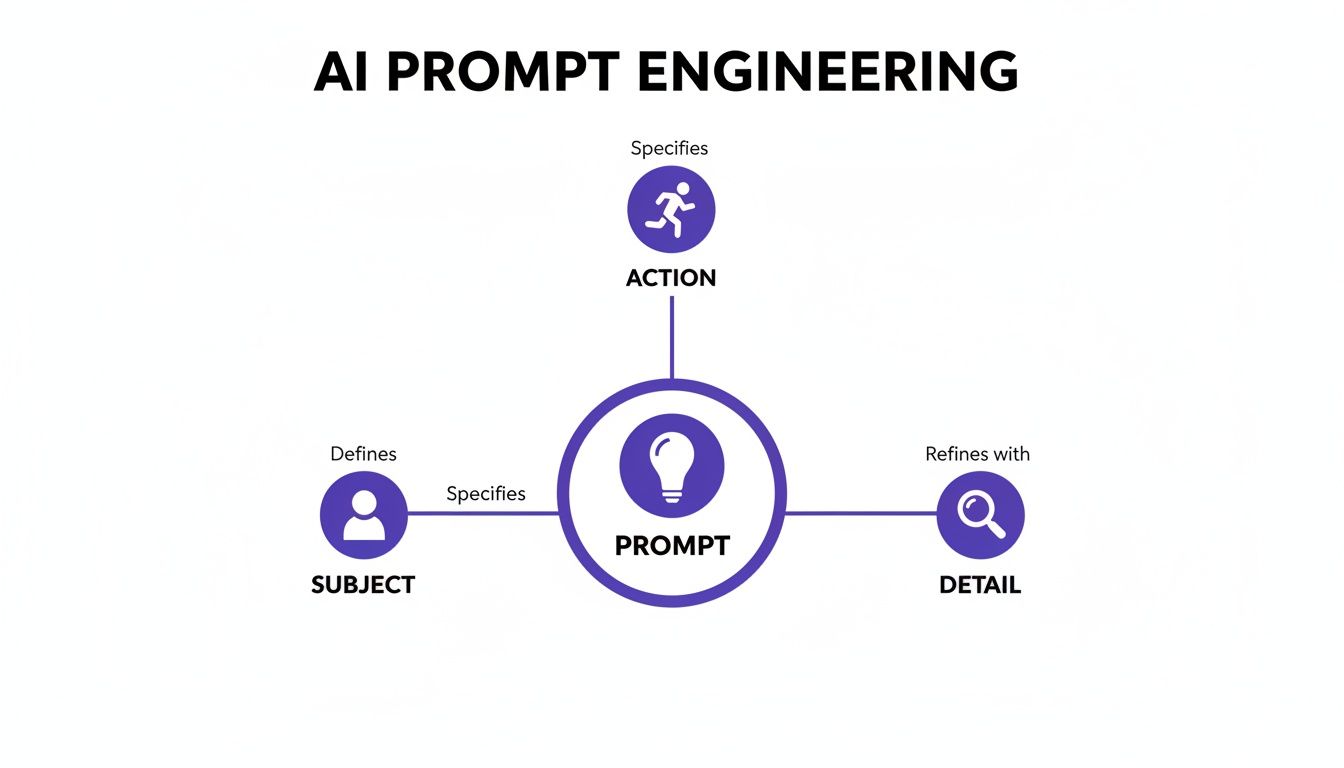
As the infographic shows, a strong prompt is a balanced recipe. The style you choose is the final, essential spice that brings all the other ingredients together.
A single prompt can yield dramatically different results just by changing the style. An image of a 'bustling city street' feels like a real-life snapshot in Photorealistic style, but it becomes a moody, neon-drenched story in Cyberpunk style.
A Strategic Guide to Popular AI Art Styles
Choosing the right aesthetic can feel overwhelming, but it's really about matching the style to your project's goal. This table breaks down some of the most popular and effective art styles, explaining what they're best for and what keywords will help you get there.
| Style Category | Best For | Emotional Impact | Example Prompt Keywords |
|---|---|---|---|
| Realism | Product mockups, marketing, architecture | Credible, Professional, Tangible | photorealistic, 8k resolution, hyperdetailed, shot on Canon 5D |
| Digital Art | Concept art, tech branding, social media | Modern, Edgy, Imaginative | 3D model, cyberpunk, digital painting, unreal engine 5 |
| Traditional Media | Blogs, branding, editorial illustrations | Artistic, Warm, Handcrafted, Organic | watercolor, gouache, oil painting, charcoal sketch |
| Historical & Niche | Themed branding, storytelling, unique ads | Nostalgic, Classic, Distinctive, Whimsical | vintage photography, art deco, ukiyo-e, steampunk |
This isn't an exhaustive list, but it's a solid framework for thinking about style not just as a visual choice, but as a communication tool that shapes how your audience feels.
Experimenting with different styles is truly the best way to develop an intuition for what works. AI Media Studio makes this incredibly easy, letting you apply different aesthetics to the same prompt without having to start from scratch. You can explore the full range of available art styles and see visual examples for each to find the perfect match. This hands-on approach will quickly build your confidence and help you master the art of visual storytelling.
Refining Your Art with Advanced Edits
Let's be honest: your first generated image is almost never the final one. Think of it as a fantastic starting block that gets you 90% of the way there. The real magic, the kind that turns a good concept into a great, professional-quality visual, happens during the refinement stage. This is where you take back full creative control.
Iteration is a huge part of learning to create AI art that actually stands out. But instead of just re-rolling your prompt over and over, hoping for a lucky break, you can use built-in editing tools to make precise, targeted adjustments. This saves a ton of time and gives you the power to fix minor imperfections or even completely transform the composition.
These tools are game-changers, especially for businesses. AI art has flipped the script on content creation, cutting production costs while boosting e-commerce conversions by an average of 40%. With over 60% of AI art platforms like AI Media Studio being cloud-based, these powerful editing features are right at your fingertips, no matter where you are.
Transforming Images with Inpainting
Think of inpainting as a magic eraser with a creative twist. This tool lets you select a specific part of your image and regenerate only that area with a new prompt. It’s perfect for fixing weird details or adding new elements without having to start from scratch.
Here’s a real-world scenario: you've generated a photorealistic image of a person in a t-shirt for an ad campaign, but the AI slapped a strange, generic logo on the chest. Instead of tossing the entire image, you can simply:
- Grab the inpainting tool and brush over the logo.
- In the prompt box that pops up, type something simple like "plain white cotton fabric."
- Hit "Generate," and the AI will seamlessly replace the logo with a clean, unbranded shirt texture.
You can use this exact same technique to change a character's facial expression, add a coffee cup to a table, or remove a distracting car from the background of a landscape. Learning more about the specifics of inpainting will unlock a ton of possibilities for fine-tuning your work.
Expanding Your Canvas with Outpainting
While inpainting fixes what’s inside your image, outpainting expands what’s outside of it. Also known as "uncropping," this feature lets you extend the boundaries of your artwork, prompting the AI to intelligently fill in the new space based on the existing content.
Outpainting is your solution for turning a tightly cropped portrait into an epic landscape or converting a square social media post into a wide-format website banner.
For example, say you generated a beautiful close-up of a mountain peak, but you need it for a website hero image that requires a panoramic view. Just use outpainting to extend the canvas horizontally. The AI will generate the surrounding mountain range, sky, and valleys, perfectly matching the original style and lighting. It’s an incredibly powerful way to reframe your compositions without losing the core of what made the original image great.
Making Final Touches and Adjustments
Beyond big compositional changes, the final polish comes from those small but crucial adjustments. Most quality AI art platforms include basic editing controls that let you dial in the final look and feel, making sure every detail is perfect before you export.
These are the essential final touches you'll want to make:
- Color Grading: Tweak the overall color temperature, saturation, and contrast. You can make the image feel warmer, cooler, or more vibrant to set the final mood.
- Sharpening Details: Enhance the clarity of fine details to make textures pop and give the entire image a crisper, more high-definition look.
- Smart-Erase Tools: For those tiny imperfections the AI might have left behind—like a slightly distorted finger or a weird floating artifact—a smart-erase tool can clean it up in seconds.
Once your AI art is generated and refined, you can take it even further by using other essential tools for content creators to integrate it into your projects. These small edits are the last step in producing a truly professional piece.
Using Your AI Creations Effectively
You’ve put in the work—dialing in the perfect prompt, tweaking the details, and generating something you’re proud of. But what happens next is just as important. This isn't just about hitting "download." It's about making sure your AI art looks just as good in the real world as it does on your screen.
Thinking about the final destination for your image from the very beginning will save you a ton of headaches later. An image meant for a massive trade show banner requires a totally different setup than a quick Instagram story. Getting the file format and size right is key to preserving quality and ensuring everything performs as it should.
For example, a PNG file is your best friend for web graphics that need a transparent background, like a logo you want to place over another image. On the other hand, a JPEG is usually the better choice for photorealistic images. It finds a great balance between quality and a smaller file size, which is absolutely critical for keeping your website loading speeds fast.
Scaling Your Creative Output
One of the real game-changers with a platform like AI Media Studio is the power to generate an entire suite of cohesive visuals in a fraction of the time it used to take. Let's say you're launching a new marketing campaign. You don't just need one hero image; you need a dozen variations for social media, email newsletters, and website banners.
This is where batch generation becomes your secret weapon.
You can take a core prompt and spin up multiple versions at once, playing with subtle shifts in camera angle, color palette, or composition. This lets you produce a complete set of on-brand assets in minutes, not days.
- Campaign Assets: Generate a main image, then create variations tailored for different ad formats.
- Blog Visuals: Create a consistent set of illustrations to run through an entire article series.
- Social Media Content: Quickly produce a week's worth of related images that all share the same aesthetic.
This approach keeps your brand’s visual identity tight and consistent across every channel, which is crucial for building recognition and trust with your audience.
The real win isn’t just creating a single perfect image; it’s the ability to scale your creative vision effortlessly. You can build an entire visual campaign around a single strong idea, ensuring every touchpoint feels connected.
Understanding Commercial Use and Legal Rights
A big question I hear all the time when people start creating AI art is, "Can I actually use this for my business?" With AI Media Studio, the answer is a straightforward yes. When you're on a paid plan, you get full commercial rights to every image you generate.
This is a massive advantage.
It means you’re free to use your creations for client projects, product packaging, advertisements, and website designs without the legal headaches that often come with traditional stock photo licenses. You own what you create, giving you the freedom to build your brand without looking over your shoulder.
Before you publish, run through this final checklist to make sure you’re good to go:
- Check Resolution: Is it high enough for its final use? Think 300 DPI for print and 72 DPI for web.
- Optimize File Size: Have you compressed the image so it loads quickly on your website without sacrificing too much quality?
- Confirm Rights: Are you clear on your commercial usage rights based on your specific plan?
- Review Platform Guidelines: If you’re posting to social media, does your image meet the platform’s specific dimension requirements?
Following these simple steps ensures all your hard work pays off, maximizing the impact and professionalism of your AI-generated art.
Answering Your Top Questions About AI Art
When you first start playing around with AI art, a few key questions always seem to pop up. It's totally natural to wonder about how steep the learning curve is, what you can legally do with your creations, and what happens when your first attempt is… well, not quite what you had in mind. Let’s tackle some of the most common questions we hear from new creators.
Think of this as the practical advice that builds on everything we've covered, designed to give you the confidence to push past those initial hurdles and just focus on creating.
Is Learning to Create AI Art Actually Hard?
Honestly, not at all—and that’s what makes it so exciting. The main skill you need isn't technical; it's learning how to describe your ideas clearly in text. This isn't like mastering complex design software that takes years of practice. Tools like AI Media Studio were built from the ground up to be intuitive.
The biggest "hurdle" is just getting a feel for writing effective prompts, which is really more of an art than a science. With a whole library of pre-set styles and easy-to-use tools, you can get professional-looking results way faster than you might think.
The best way to learn is just by doing. There is no substitute for trying out different prompt combinations, playing with styles, and seeing what comes out. Every single image you generate teaches you something new about how the AI thinks.
This hands-on approach makes the whole thing feel less like a technical chore and more like creative play.
Can I Use My AI Art for Commercial Projects?
Absolutely, and this is a massive advantage for professionals. With the right subscription, platforms like AI Media Studio give you full commercial rights to the images you generate. For businesses and creators, this is a game-changer.
This means you can use your artwork for a huge range of for-profit projects without worrying about legal headaches.
- Marketing Campaigns: Design one-of-a-kind visuals for your digital ads, social media feeds, and email blasts.
- Website Assets: Create custom hero images, blog headers, and icons that perfectly match your brand's vibe.
- Product Design: Use your generated art for merchandise like t-shirts, posters, or product packaging.
It's an incredibly cost-effective way to get unique visuals without licensing pricey stock photos or hiring a designer for every little thing. Of course, you should always double-check the specific terms of your plan, but these tools are built to support commercial work.
What if My First Attempt Isn't What I Wanted?
That’s completely normal—it’s just part of the process. Nobody nails it on the first click. The trick is to see your first output not as a failure, but as a rough draft. Iteration is everything.
Your first step should always be to revisit and tweak your prompt. Can you be more specific? Try adding more descriptive details about the subject, the setting, the lighting, or the exact mood you're aiming for.
If the image is almost there but has a few weird spots, that’s when you bring in the editing tools.
- Use 'Inpainting' to fix or replace small, awkward areas.
- Use 'Outpainting' to expand the canvas and give your subject better framing.
- Generate multiple versions of the same prompt to see how the AI interprets it differently.
Treat every output as a stepping stone. Keep experimenting with your wording and playing with different styles until the image on your screen finally matches the one in your head.
How Is My Creative Work Kept Private?
Your privacy and intellectual property are taken very seriously. When you're working on a secure platform like AI Media Studio, your prompts and the images you create are yours and yours alone. They are not used to train AI models or shared publicly unless you choose to do so.
This is especially critical for business and team accounts where you might be working on sensitive projects. Access to your work is kept completely within your private workspace, so your concepts for a new ad campaign or a confidential product design stay that way. This security lets you experiment freely, knowing your best ideas are safe from competitors and the public eye.
Ready to put all this into practice? With AI Media Studio, you have everything you need to generate incredible, professional-quality visuals in seconds. It’s time to bring your most creative ideas to life.