Generating AI images sounds complicated, but it's really about turning your text descriptions into visual art. You just write what you're imagining, pick a style you like, and let the AI build a unique image for you in seconds. It’s a skill anyone can learn and a seriously powerful way to produce custom visuals.
Your First Steps Into AI Image Generation
Welcome to the world of AI image generation—a space where your imagination is pretty much the only limit. The process of turning simple text into stunning visuals might seem technical on the surface, but it's built on a simple, creative foundation.
At its core, you start with an idea, craft a descriptive prompt, select a visual style, and then generate and refine your image. That's it.
This accessibility is a game-changer for marketers, artists, and creators of all stripes. You no longer need years of design training to bring your ideas to life. These tools empower you to create professional-quality visuals almost instantly.
The Basic Creative Workflow
The fundamental journey from a concept in your head to a finished creation is surprisingly simple. This visual flow chart breaks down the essential steps.
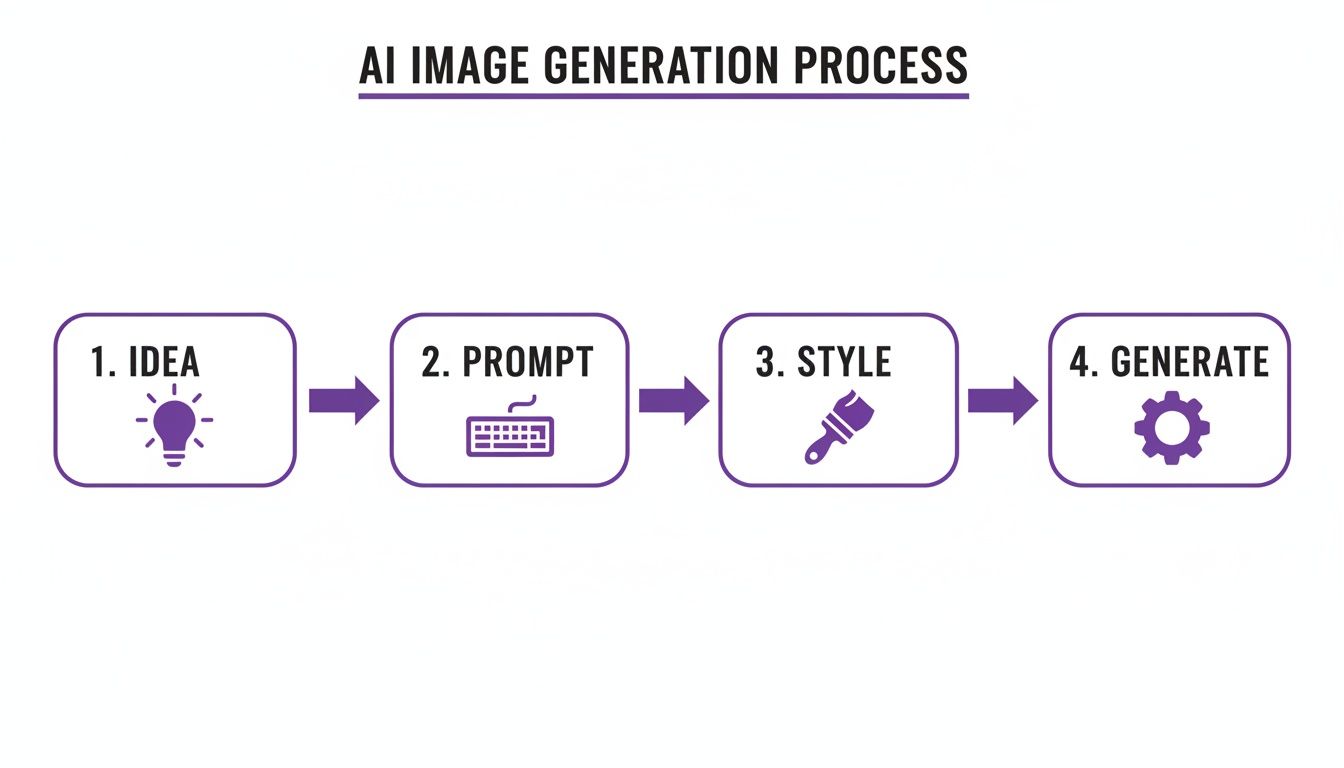
As you can see, the process isn't overly technical but creative, with each step building on the last to shape your final output.
For anyone just starting out, this table gives you a quick snapshot of the entire process from start to finish.
| Phase | Action | Key Goal |
|---|---|---|
| Ideation | Brainstorm your core concept. | Define the subject, mood, and purpose of your image. |
| Prompting | Write a clear, descriptive text prompt. | Translate your idea into instructions the AI can understand. |
| Styling | Choose an artistic style or aesthetic. | Guide the AI on the final look and feel (e.g., photo, painting, 3D). |
| Generation | Click "Generate" and review the output. | Create the initial image and prepare for any needed refinements. |
Think of this as your basic roadmap. Once you get the hang of these four phases, you'll be creating amazing images in no time.
A Rapidly Growing Creative Field
The enthusiasm for this technology isn't just hype; it's backed by incredible market growth. The AI image generator market has seen explosive expansion, skyrocketing from USD 418.5 million to a projected USD 2,633.2 million by 2035.
That growth is fueled by a robust compound annual growth rate (CAGR) of 18.2%. This surge shows how generating AI images has shifted from a niche experiment to a cornerstone of creative industries.
Key Takeaway: The ability to generate AI images is more than a novelty; it's a rapidly expanding skill set with practical applications across numerous industries. It's becoming an essential tool for modern content creation.
Ready to dive in? AI Media Studio offers a powerful and intuitive platform to start your journey. You can begin experimenting right away with our free AI art generator to bring your first ideas to life.
To get a better sense of the broader landscape, it's also helpful to explore the best AI content creation tools out there. This will give you a feel for how image generation fits into the wider content ecosystem, which includes everything from video to text.
Writing Prompts That Actually Work
Your prompt is the single most important part of the entire creative process. Seriously. Think of it as your direct line to the AI's brain—mastering it is what separates a decent image from a jaw-dropping one. To really learn how to generate AI images that pop, you have to move beyond one-word requests.
A great prompt isn't just a single idea; it's more like a recipe with a few key ingredients. When you combine them correctly, you give the AI a clear, detailed blueprint of your vision. This leaves way less to chance and gives you far more control over what comes out the other side.
The Anatomy of a Powerful Prompt
Let’s see this in action. A simple prompt like "a futuristic car" might give you something cool, but it's a total crapshoot. The AI has to fill in all the blanks on its own, and its guess might not be what you had in mind.
Now, check out a much more descriptive prompt that builds a complete picture:
A sleek, aerodynamic sports car (Subject) with a chrome finish and glowing neon blue accents (Details), racing down a rain-slicked cyberpunk city street at night (Environment), illuminated by holographic billboards (Lighting), cinematic, photorealistic, 8K resolution (Style).
See the difference? That level of detail transforms your request from a vague idea into a specific, vivid scene. The quality and relevance of the image you get back will improve dramatically.
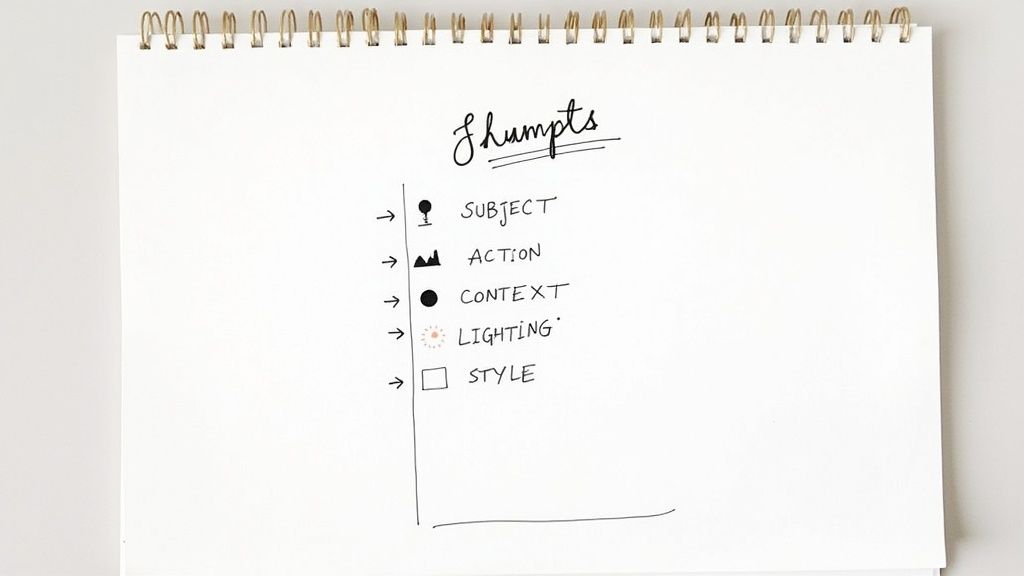
To consistently nail this, I try to include these elements in my prompts:
- Subject: The main focus. Think "an ancient oak tree" or "a stoic astronaut."
- Action: What’s the subject doing? Maybe it’s "standing on a cliff" or "reading a holographic map."
- Environment: The setting or background. Is it "in a misty forest" or "inside a bustling space station"?
- Lighting: This sets the mood. Is it "soft morning light" or a "dramatic neon glow"?
- Style: The artistic vibe you’re going for. "Watercolor painting," "photorealistic," or "anime" are all great style cues.
The scale of AI image generation is just staggering. Every single day, an incredible 34 million AI-generated images are created on major platforms. That adds up to over 15 billion images since 2022—a milestone that took traditional photography 149 years to hit. Stable Diffusion, an open-source model, is the engine behind roughly 80% of these creations, which just shows how massive this technology has become.
Using Negative Prompts for Finer Control
Sometimes, telling the AI what not to include is just as important as telling it what you do want. This is where negative prompts become your secret weapon. A negative prompt is simply a list of words or concepts you want the AI to avoid, giving you an extra layer of precision.
For example, if you keep getting images with weird, distorted hands or ugly text watermarks, you can use a negative prompt to steer the AI clear of those common mistakes.
Common Negative Prompt Terms
| Category | Example Terms to Avoid |
|---|---|
| Quality | blurry, low resolution, jpeg artifacts, grainy |
| Anatomy | deformed hands, extra fingers, poorly drawn face |
| Composition | watermark, text, signature, username |
| Style | cartoon, drawing, sketch, ugly |
Just adding --no text, watermark to your prompt can help you get a much cleaner, more professional-looking image. This technique is absolutely essential for refining your outputs and getting polished results. For even more granular adjustments after the fact, you can explore advanced tools like AI photo editing by prompt to make targeted tweaks.
Choosing the Right Style and Settings
Once you have a solid prompt, it's time to play art director. This is where you shift from telling the AI what to create to showing it how you want it to look. The style you select is arguably one of the most important decisions you'll make, as it dictates the entire mood, tone, and emotional impact of your final image.
AI Media Studio puts a library of over 50 distinct art styles at your fingertips, spanning everything from gritty photorealism to whimsical, abstract designs. Your choice here should be a direct reflection of your goal. Let's say you're creating a visual for a cozy, rustic coffee shop. A "vintage poster" style would be a fantastic choice to stir up feelings of warmth and tradition.
But what if that same coffee shop is launching a sleek new cold brew? Suddenly, a "modern minimalist" style feels much more appropriate. It sends a completely different message: clean, sharp, and contemporary. This simple switch can completely transform the image's story.
Mastering the Technical Parameters
Beyond the overall aesthetic, a couple of key technical settings give you even more command over the final output. Don't gloss over these—they’re essential for making sure your images are perfectly suited for their final destination.
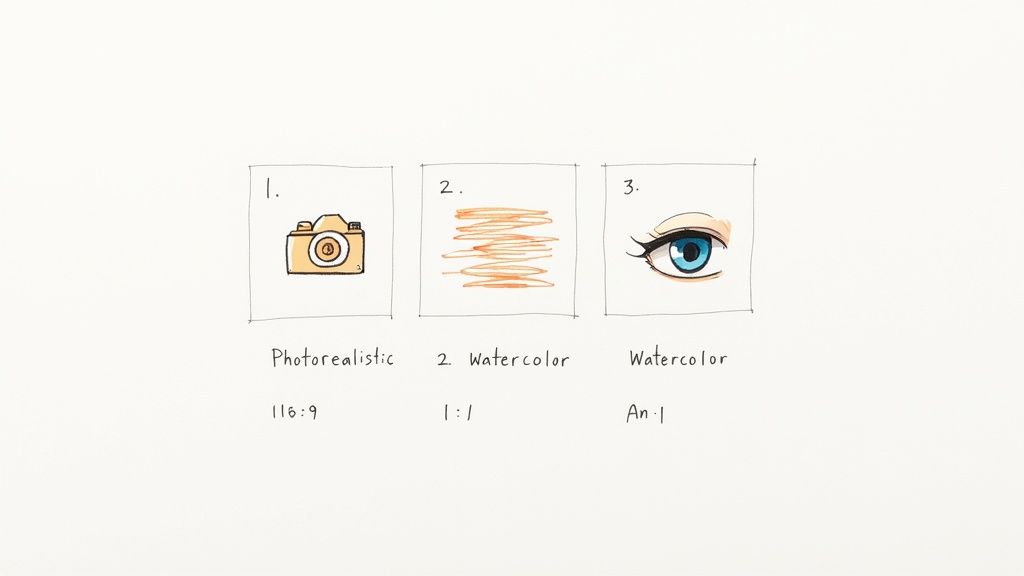
- Aspect Ratio: This is just a fancy term for the shape of your image. A widescreen 16:9 ratio is perfect for a YouTube thumbnail, while a classic square 1:1 is the go-to for Instagram posts or profile pictures. Always think about where the image will live before you hit "generate."
- Seed Number: The seed is a specific number that acts as the unique starting point for an image. If you use the exact same prompt and the same seed number, you'll get a nearly identical image every time. This is a game-changer when you strike gold and want to create slight variations or maintain a consistent look across a whole set of images.
Pro Tip: Found an image you absolutely love? Immediately save that seed number. It’s like saving the DNA of your creation, giving you the power to recreate that specific magic whenever you need it.
For instance, if you're aiming for an incredibly lifelike portrait for a corporate website or a product mockup, you'd want to select the photorealistic style. This style is specifically trained to mimic the depth and detail of a real photograph. To really nail this look, check out our in-depth guide on the photorealistic style.
Practical Application: The Coffee Shop Visual
Here’s a quick breakdown to show how style and settings work together to achieve two very different goals for the same brand.
| Setting | Vintage Poster | Modern Minimalist |
|---|---|---|
| Goal | Promote a cozy, traditional atmosphere. | Launch a new, sleek cold brew product. |
| Style Keywords | warm tones, retro, textured, hand-drawn | clean lines, neutral colors, negative space |
| Aspect Ratio | 4:5 (for a print-style social post) | 1:1 (for a clean product shot on Insta) |
By thoughtfully picking your style and tweaking these settings, you stop being a button-pusher and start being a creative director. This level of control is fundamental to generating AI images that not only look professional but truly capture the vision you have in your head.
Advanced Techniques for Refining Your Images
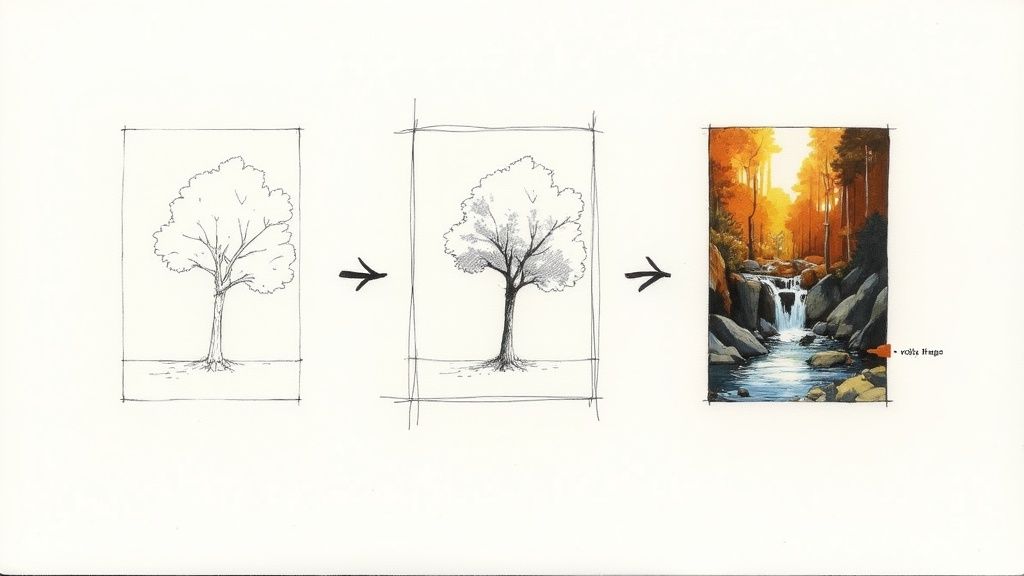
Your first generated image is almost never your final one. I've found that true mastery in AI image generation comes from the refinement process—those small, deliberate tweaks that elevate a good image into a great one. This is where you graduate from being a simple prompt writer to a digital artist, collaborating with the AI to perfect every last detail.
Think of your initial output as a high-quality draft. Now, it's time to roll up your sleeves and use more advanced tools to fix imperfections and add those creative flourishes your first prompt might have missed. This is where features like inpainting and outpainting really shine, giving you surgical precision over your digital canvas.
This kind of artistic progression mirrors the explosive growth of the industry itself. Market forecasts are all over the place but point in one direction: up. Estimates for the generative AI market range from USD 8.7 billion to a massive USD 60.8 billion by 2030. This incredible trajectory shows just how central these tools are becoming to visual content creation. You can dig into more insights about this rapidly expanding market on marketsandmarkets.com.
Fixing Specific Areas with Inpainting
One of the most common frustrations in AI image generation is getting small details right. We've all seen the slightly distorted hands or garbled text. Inpainting is your go-to solution for this. It lets you select or "mask" a specific area of your image and regenerate only that part with a new, corrected prompt.
Let's say you've generated a stunning portrait, but the subject's hands just look a bit off. Instead of scrapping the whole thing and starting over, you can use inpainting to:
- Select the hands using the masking tool.
- Write a new prompt like "realistically rendered hands, relaxed position."
- Generate again, and watch as the AI creates new, natural-looking hands that fit seamlessly into the existing image.
This tool is incredibly versatile. I've used it to add entirely new objects, like placing a steaming coffee cup on a previously empty table, or to remove a distracting element from the background that was pulling focus. You can learn more about how to use this feature in our guide on AI Media Studio's inpainting tool.
Expanding Your Canvas with Outpainting
Ever generated an image that feels a bit too cropped? Or wished you could see what lies just beyond the frame? That’s exactly what outpainting is for. This technique expands the canvas in any direction you choose, and the AI intelligently fills in the new space based on the context of the existing image.
For example, you might have a great close-up shot of a medieval castle but want a wider, more epic landscape view. With outpainting, you can extend the canvas to the left and right, and the AI will generate rolling hills, a surrounding village, or a dramatic sky to complete the scene.
Key Insight: The real power of AI image generation isn't just in the first click. It's in the iterative dialogue between you and the tool. Inpainting and outpainting are your most important conversational tools for getting the final image exactly right.
These refinement techniques transform the process from a single command into a dynamic collaboration. By patiently making small adjustments—adding a waterfall to a landscape, or shifting the lighting to that perfect golden hour—you can elevate your creations from simple outputs to true works of art.
Putting Your AI Images to Work
Knowing the techniques is one thing, but the real fun begins when you start using them to solve actual problems. This is the moment AI image generation goes from being a neat party trick to a serious asset for your business or creative project. The applications are incredibly diverse, and they can save you a surprising amount of time and money.
Instead of just talking theory, let's walk through a few tangible, real-world scenarios where AI visuals can make a direct impact. From marketing campaigns to product design, the possibilities are huge.
For Marketing and Social Media
Picture this: you're managing marketing for a new tech startup. You need a striking header image for a blog post titled "The Future of Sustainable AI." A generic stock photo just won't cut it—it feels cheap and fails to capture the unique angle of your article.
Instead of hunting for a graphic designer and going through a lengthy brief, you can turn straight to AI. By crafting a specific prompt, you can generate a visual that perfectly matches your content's theme, creating a much stronger first impression on your readers.
- Scenario: Create a unique blog header.
- Prompt Example:
A futuristic cityscape with lush green buildings and glowing data streams, solar panels integrated into architecture, optimistic and bright atmosphere, digital art, high detail.
This same approach is a lifesaver for social media. A small business can generate an entire month's worth of Instagram posts without a single photoshoot. For an e-commerce brand selling handcrafted leather goods, creating lifestyle shots is an absolute game-changer.
Prompt:
A close-up shot of a brown leather wallet resting on a rustic wooden table next to a steaming cup of coffee, soft morning light filtering through a window, photorealistic, warm and inviting.
This lets the brand showcase its product in all sorts of appealing settings without the massive expense of photographers, models, and locations. The whole process is about gaining speed and creative control.
For Product and Game Development
The power of AI imagery goes way beyond marketing. If you're an indie game developer, the early stages of visualizing characters and environments can be a major bottleneck that slows everything down. AI can put that concept phase into hyperdrive.
A developer can instantly generate dozens of character variations, exploring different armor styles, facial features, and color schemes in a matter of minutes. This kind of rapid ideation helps solidify the game's artistic direction long before committing serious resources to detailed 3D modeling.
- Goal: Visualize a video game character.
- Prompt Example:
Concept art of a female elven warrior, intricate silver armor with leaf motifs, holding a glowing bow, fantasy style, detailed face, cinematic lighting.
This allows for a much more fluid and creative pre-production process. The same logic applies to product designers, who can visualize prototypes in different materials or settings, helping stakeholders see the vision clearly from day one. By learning how to generate AI images, you're essentially building a powerful engine for rapid, low-cost visualization, turning abstract ideas into concrete visuals that push projects forward.
Common Questions About Generating AI Images
Even when you start getting the hang of AI image generation, questions are always going to pop up. It’s just part of figuring this stuff out. This section dives into some of the most common things people ask, giving you straight answers so you can create with a lot more confidence.
Think of this as the cheat sheet for smoothing out the learning curve. Knowing the answers to these will help you sidestep common frustrations and get the most out of your creative time.
Can I Use My AI Images for Commercial Projects?
This is a big one, and the answer is simple: it all comes down to the tool’s specific terms of service. Every platform handles ownership and usage rights differently, so you can't make any assumptions.
- Permissive Licenses: Some platforms, like AI Media Studio, give you full commercial rights for images you create on their paid plans. That means you're clear to use them for marketing, merchandise, websites—whatever your business needs.
- Restricted Licenses: Other tools might limit you to personal projects only or have really complicated licensing rules you have to navigate.
Crucial Takeaway: Always, and I mean always, check the licensing agreement before you use an AI-generated image for anything commercial. This one step can save you from a world of legal trouble later. It's on you to make sure you have the right permissions.
How Do I Fix Weird Hands or Uncanny Faces?
Ah, the classic AI quirks. Getting mangled hands or strange-looking faces is a common rite of passage. The good news is, you usually don't have to scrap the whole image. Fixing these issues is more about targeted refinement.
Your first move should always be to tweak your prompt. Try getting more specific with phrases like "realistically rendered hands with five fingers" or using a negative prompt to forbid things like "deformed hands, extra fingers, poorly drawn face." Often, that’s all it takes to clean things up.
For those really stubborn errors, inpainting is your secret weapon. This feature lets you draw a mask over just the problem area—like the hands or part of a face—and regenerate only that little section with a more focused prompt. It’s like performing digital microsurgery, giving you pinpoint control to nail the details without messing up the rest of your image.
How Can I Create a Consistent Style Across Multiple Images?
Keeping a consistent style is a must for branding, creating a series of illustrations, or any project that needs a cohesive vibe. The key to unlocking this is a little thing called a seed number.
A seed is just a number that kicks off the AI's generation process. If you use the exact same prompt and the exact same seed number, you’ll get a nearly identical image every single time. It’s the anchor for consistency.
To create a whole set of visuals that look like they belong together:
- Generate an image you really like, then immediately find and copy its seed number.
- When you create your next images, plug in that same seed number and only make small changes to the subject in your prompt.
- Combine this with a detailed style description in every prompt—like "minimalist line art, pastel color palette, soft lighting"—to really lock in the aesthetic.
Ready to stop troubleshooting and start creating? AI Media Studio gives you all the tools you need—from over 50 art styles to advanced inpainting—to make your ideas a reality. Start generating for free today and see what you can cook up.