At its core, a comic book generator is an AI tool that takes your text prompts and turns them into visual comic panels. It's like having a digital artist on call, ready to help you generate characters, build scenes, and lay out entire pages, from the first spark of an idea to the finished product.
Your AI Comic Creation Workflow
So, how do we go from making single, disconnected images to building a full-blown comic? This guide lays out the entire process. We're going to walk through turning a rough idea—something you might scribble on a napkin—into a polished, ready-to-export comic page. You'll learn how to think through a story, write scripts the AI can actually understand, create consistent characters, and piece it all together.
Think of this as your roadmap. By the end, you won't just be a prompt engineer; you'll have a repeatable system for bringing any story to life in comic form.
From Concept to Creation
The whole journey is a series of stages, with each one building on the last to make sure everything holds together. It's about more than just typing a few words and hoping for the best. You have to structure your creative process to work with the AI, not against it. These tools have made things incredibly efficient. In fact, a 2023 study found that AI-generated comics could slash production time by up to 40% compared to old-school methods.
This diagram breaks down the main steps involved, from the initial idea to final assembly.
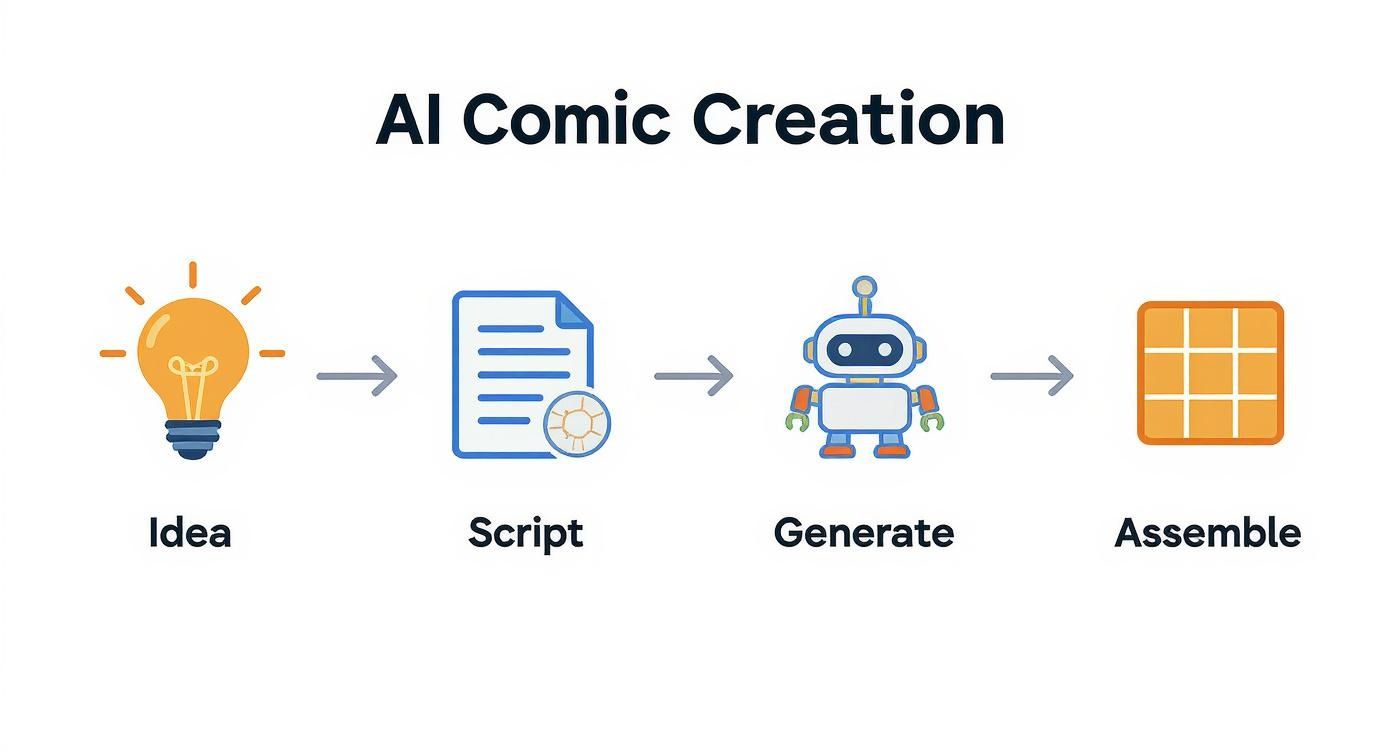
As you can see, having a plan is what makes it possible to translate a story into a sequence of panels that actually make sense.
To give you a clearer picture, here’s a quick breakdown of what this process looks like from a high level.
Key Stages in AI Comic Book Generation
| Stage | Objective | Key AI Tool/Technique |
|---|---|---|
| 1. Concept & Scripting | Develop the story, characters, and dialogue. | AI text generators (for ideas), manual scripting. |
| 2. Style & Character Definition | Create a consistent visual style and main characters. | Image generator with seed locking, character sheets. |
| 3. Panel Generation | Generate individual comic panels based on the script. | Detailed text-to-image prompting. |
| 4. Assembly & Finishing | Combine panels, add lettering, and finalize the page. | Image editors (e.g., Photoshop) for layout and text. |
This table outlines the core workflow, but the real magic happens when you nail down a process that works for you.
Structuring Your Process for Success
A solid, well-defined workflow is your best defense against frustration. It's the secret to getting consistent results. If you just generate random images and try to shoehorn them into a story, you'll waste a ton of time. A methodical approach, on the other hand, saves time and dramatically improves the quality of your final comic.
Following a structured process is the best way to keep your creative vision from getting lost along the way. You can dive deeper into building effective systems in our guide on the ideal content creation workflow.
The real power of a comic book generator isn't just in creating the art itself, but in how fast it lets you visualize ideas. A process that used to take days of sketching can now happen in minutes, which gives you so much more room to experiment and play.
As you start building out your own workflow, it’s a good idea to explore the different AI content generation tools out there. Getting familiar with what’s possible will help you refine your techniques and pick the right tool for each job. From AI scripting assistants to image upscalers, having a bigger toolkit will only make your comics better.
Building the Foundation of Your Comic Story
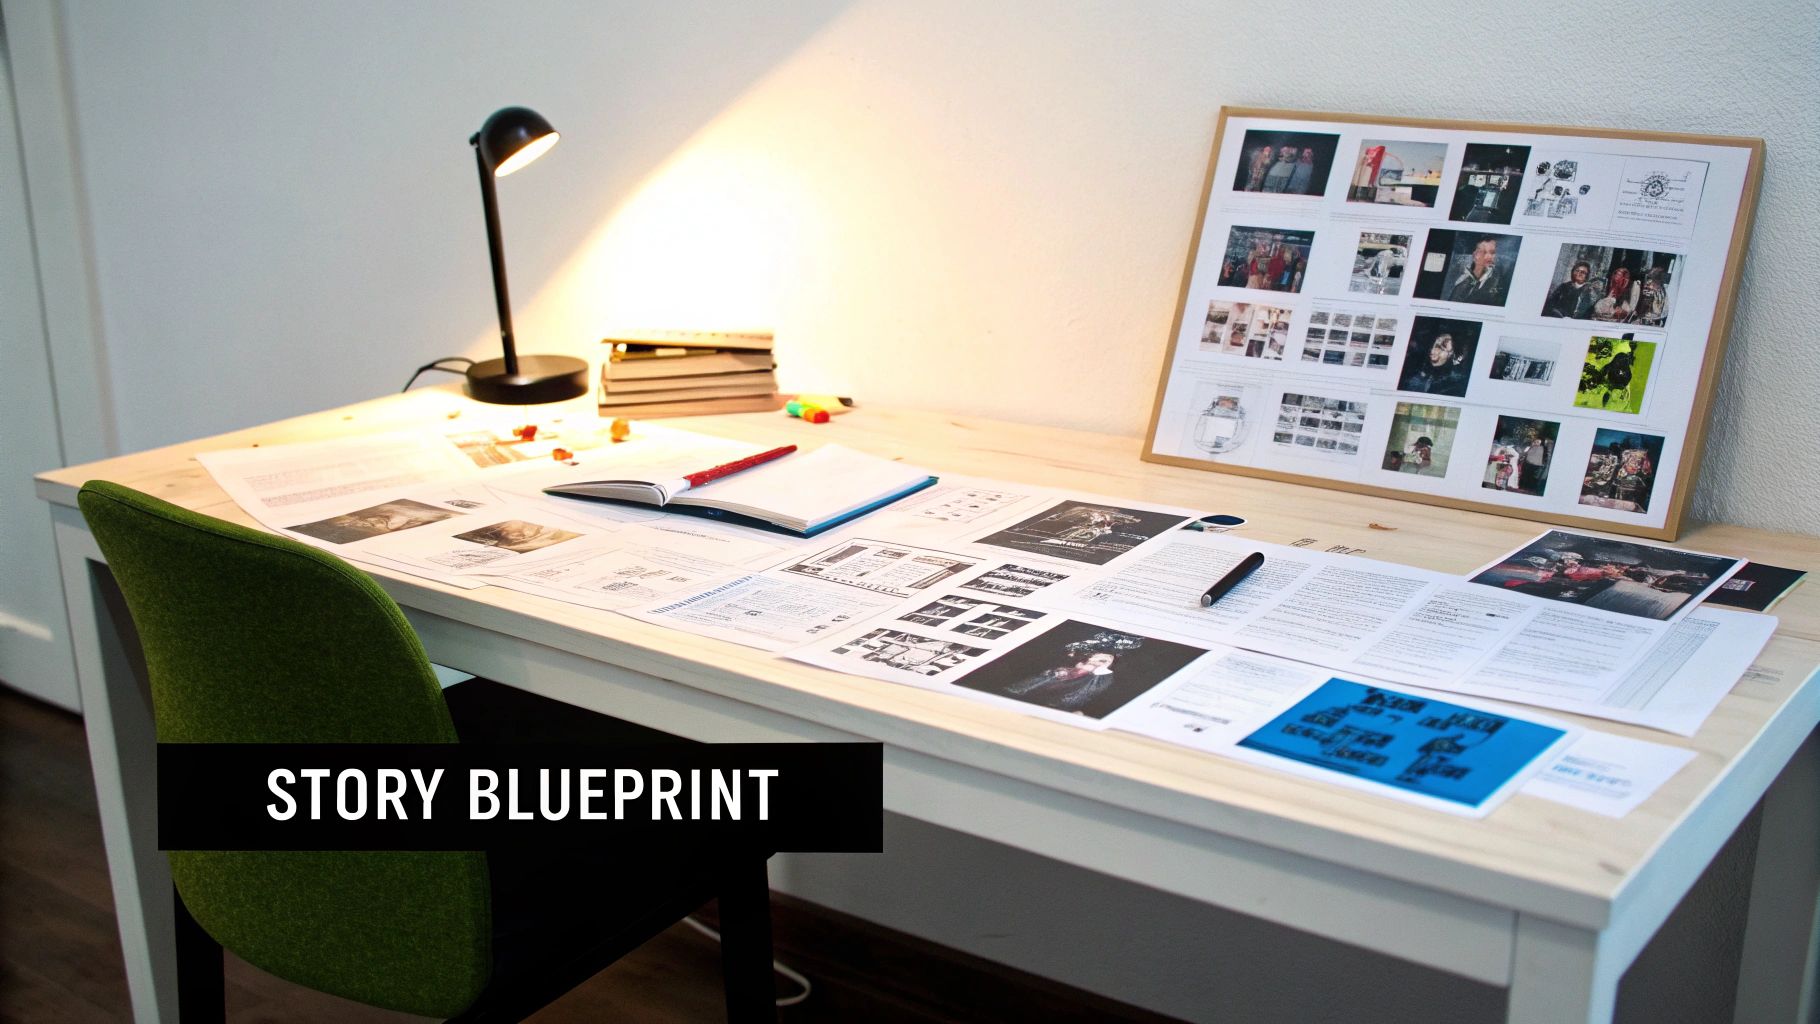
Before you generate a single image, you need a blueprint. A great comic is built on a solid foundation of story and style, and this initial planning phase is where you give your comic book generator the instructions it needs to succeed. I've seen it time and time again: rushing this step is the number one reason AI comics feel disjointed and inconsistent.
The goal here is to move beyond a simple plot idea and develop a detailed, actionable plan. This means creating rock-solid character sheets, defining a specific artistic direction, and—most importantly—learning to "script for the AI." It’s a completely different way of thinking about storytelling.
From Narrative Idea to Visual Script
Traditional comic scripts often leave a lot to the artist's interpretation. An AI, however, needs explicit instructions for everything. You have to become both the writer and the art director, translating every narrative beat into a concrete visual description.
Think of it this way: instead of writing "Anya looks worried," you need to script something far more specific, like "Close-up on Anya’s face, eyebrows furrowed, lips slightly parted in concern, shadows under her eyes, city lights reflecting in her pupils." Honestly, this level of detail is non-negotiable for getting the results you want.
Your script will essentially become a sequence of highly specific, prompt-ready descriptions. Each description will correspond to a single panel, giving you a clear plan before you even touch your image generator.
Developing Your Character Sheets
Consistency is king in comics, and that starts with your characters. Before you even think about writing the script, create a detailed "character sheet" for each major player. This document will be your single source of truth for maintaining their appearance across dozens, or even hundreds, of panels.
A good character sheet should include:
- Physical Traits: Get specific. Note details like hair color and style, eye color, height, build, and any distinguishing marks like scars or tattoos.
- Core Outfit: Define a primary costume or outfit. Describe each piece of clothing—its color, material, and style (e.g., "worn brown leather jacket," "dark gray cargo pants," "scuffed combat boots").
- Key Expressions: List a few go-to expressions and how to describe them in prompts (e.g., "determined expression with a clenched jaw," "sarcastic smirk with one eyebrow raised").
This character sheet isn't just a reference for you; it's the source material for your prompts. You'll copy and paste these core descriptors into almost every prompt featuring that character to ensure the AI remembers who they are.
For instance, a consistent prompt prefix for a character might be: "Anya, a female detective with short black hair in a messy bob, sharp green eyes, wearing a worn brown leather jacket over a white t-shirt." This becomes your character's "call sign" that you'll use constantly.
Defining a Cohesive Artistic Style
Next up, you need to lock down your visual style. A comic book generator can produce countless aesthetics, from vintage pulp to modern manga. Choosing one and sticking with it is absolutely essential for a professional look.
I always recommend starting by gathering reference images. Find artists or comic styles you admire and analyze what makes them work. Is it the bold ink lines? The muted, moody color palette? The dynamic, cinematic camera angles?
Once you have a clear vision, translate it into prompt keywords. Here’s a quick look at how different style prompts can completely change the final output:
| Style Goal | Potential Prompt Keywords |
|---|---|
| Gritty Noir | monochromatic, high contrast, dramatic shadows, film noir aesthetic, gritty texture |
| Vibrant Sci-Fi | cyberpunk, neon-drenched, futuristic city, glowing holographic details, dynamic angles |
| Classic Superhero | bold ink lines, vibrant primary colors, ben day dots, dynamic action pose, comic book art style |
Choose your style keywords and use them religiously in every single panel you generate. This, combined with your character call signs, forms the bedrock of a visually coherent comic. It’s this foundational work that separates a collection of cool but random images from a genuine, flowing story.
Generating Consistent Characters and Panels
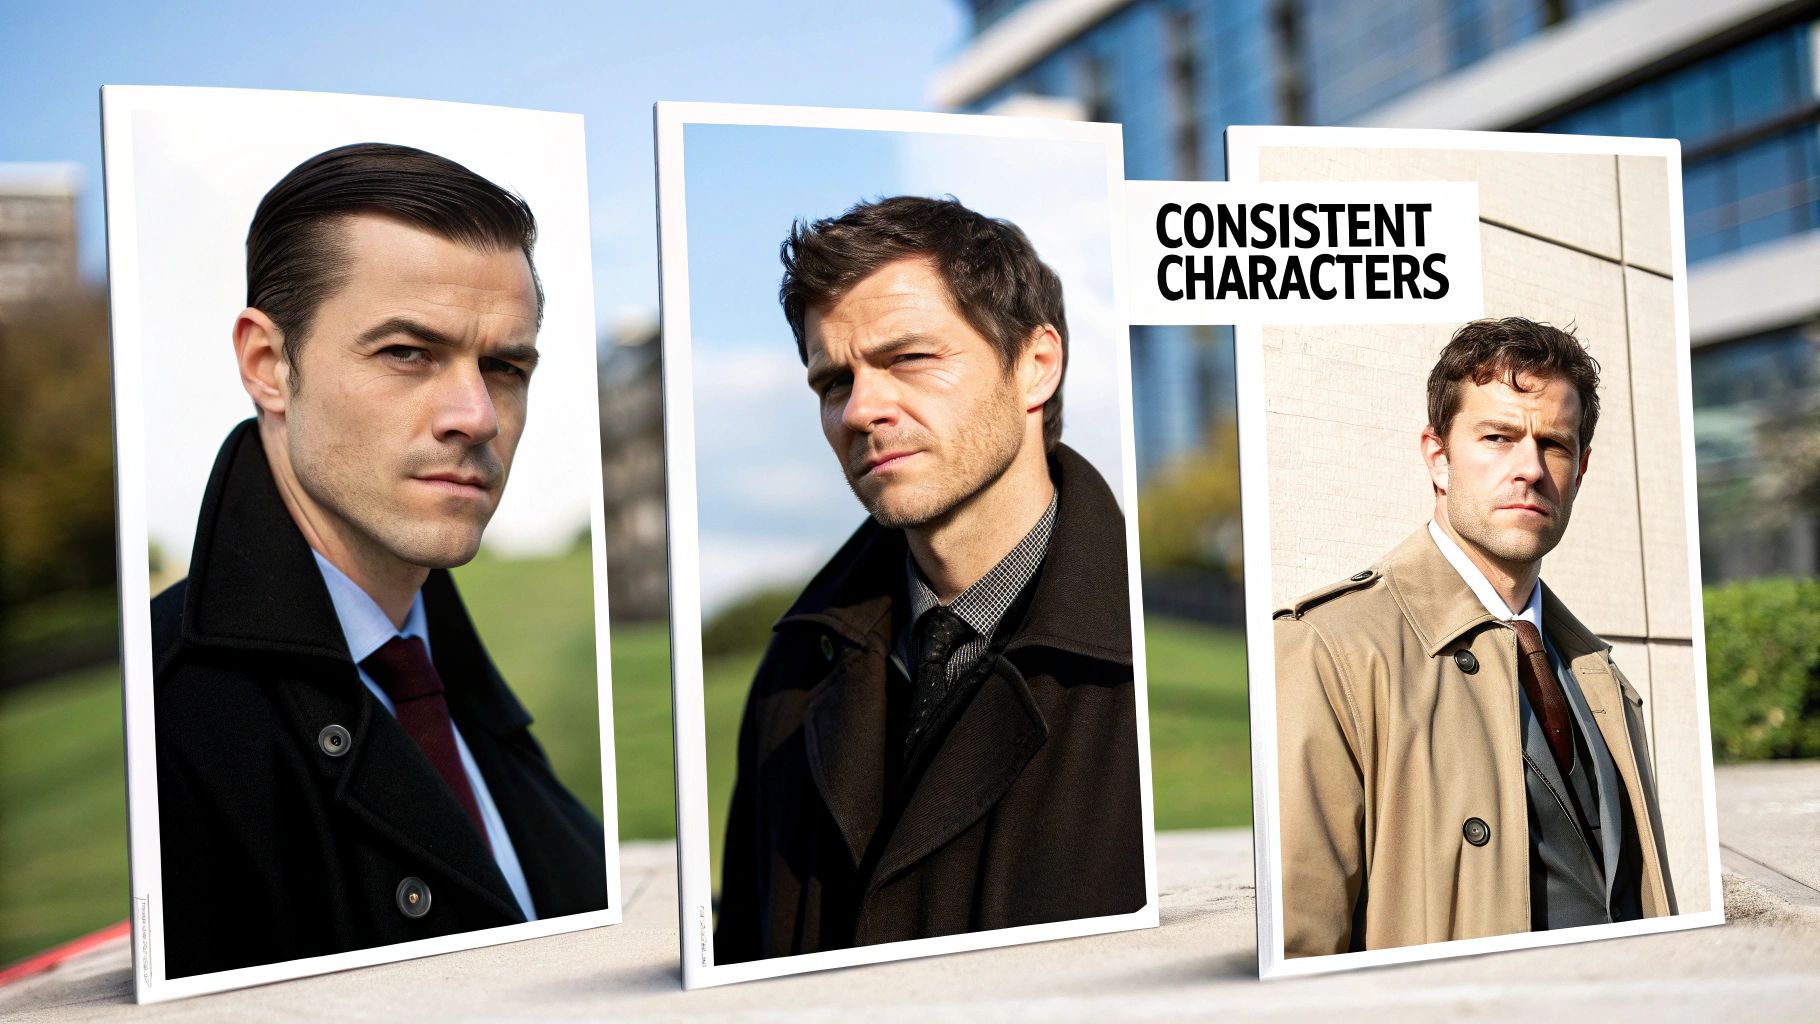
Alright, this is where the magic really happens—and where most people get tripped up. It’s one thing to generate a single, jaw-dropping image. It's a whole different ballgame to make a character look the same across an entire story.
Character consistency is what sells the illusion. Without it, your reader is pulled out of the experience, and the story falls apart. The secret isn't just luck; it's about giving your comic book generator a strict set of rules it can't break. We’ll do this with some smart prompting, strategic use of seeds, and a few post-generation tricks.
Locking in Your Visual DNA with Seed Numbers
One of the most powerful tools for consistency is the humble seed number. Think of a seed as a starting point for the AI's random generation. Use the same prompt with the same seed, and you’ll get an almost identical result. This is your key to locking in a vibe.
You won't use the same seed for every single panel, of course—that would just create duplicate images. Instead, use it to establish a stylistic baseline. Generate a batch of images until you find the one that perfectly nails your comic's atmosphere. Save that seed number!
This "master seed" becomes your anchor. Use it for critical establishing shots or any time you need to reset the visual tone to ensure everything feels like it belongs in the same universe.
Mastering the Character Call Sign
We mentioned this before, but your character's "call sign"—that core block of descriptive text—is your most important asset. It's the non-negotiable part of every prompt featuring that character.
Let's say your protagonist is Anya. Her base call sign might be:
Anya, female detective, short black hair, leather jacket, determined expression
You'll include this in every prompt. But what if she needs to look surprised? You don't replace the call sign; you add to it.
- For surprise:
Anya, female detective, short black hair, leather jacket, **face showing shock, eyes wide, mouth open**. - For a smile:
Anya, female detective, short black hair, leather jacket, **a slight, knowing smile on her face**.
By keeping the core description constant, you're constantly reminding the AI of the character's baseline look. This drastically cuts down on the AI randomly changing her hair color or outfit between panels.
A great way to build a robust character model is by creating a dedicated reference sheet before you even start making panels. For a deeper dive, check out our guide on using an AI character generator to produce these foundational assets.
Generating Panels from Different Angles
A comic page filled with nothing but chest-up medium shots is a recipe for boredom. To make your story feel dynamic, you need to think like a film director and vary your camera angles by adding shot descriptions to your prompts.
Here are a few essentials you should be using:
- Establishing Shot:
Wide angle shot, showing the entire neon-lit alleyway at night, rain slicking the pavement. - Medium Shot:
Medium shot of Anya from the waist up, leaning against a brick wall. - Close-Up:
Extreme close-up on Anya's eyes, reflecting the city lights, showing intense focus. - Over-the-Shoulder Shot:
Shot from over Anya's shoulder, looking at the mysterious figure in the distance.
Mixing these shots is how you control the rhythm and pacing. A quick burst of close-ups can ramp up the tension, while a wide shot lets the reader breathe and take in the world you've built.
Fine-Tuning with Inpainting and Outpainting
Let's be real: no matter how perfect your prompts are, the AI will eventually mess something up. You'll get a panel that’s almost perfect, except the character has six fingers or there's a weird artifact in the background.
This is where inpainting and outpainting save the day.
Inpainting lets you mask a specific part of an image and tell the AI to regenerate just that little piece. It’s a lifesaver for fixing small errors without rerolling the whole panel. You can simply mask a wonky hand and prompt "a realistic human hand" to correct it.
Outpainting does the opposite—it expands the image's canvas. The AI intelligently fills in the new space to match the existing picture. This is amazing if you realize a panel needs to be wider or you want to add more background detail to an existing shot. These tools turn you from a generator operator into a true editor.
Assembling and Lettering Your Comic Pages
Alright, you've done the hard work of prompting and now have a folder overflowing with amazing, consistent panels. That’s a massive win. But right now, they're just a collection of images. It's time to put on your page designer hat and transform those individual art pieces into a cohesive, professional comic page.
This is where the magic of assembly and integration happens. We're going to dive into laying out your panels to control the story's pace and adding lettering that feels like it belongs in your world—not just text slapped on an image. Your comic book generator provided the raw ingredients; now, you're the chef pulling the whole dish together.
Choosing Your Assembly Toolkit
First things first, you need a digital canvas to build your pages. The good news is you don't need hyper-specialized software; a lot of standard graphic design tools will do the trick perfectly. The most important feature is solid layer support and flexible text tools.
You've got options, and they usually fall into two main camps: the industry-standard paid tools and some surprisingly powerful free alternatives.
- Paid Software: Tools like Adobe Photoshop and Affinity Photo are the workhorses for a reason. They give you incredibly granular control over masking, color correction, and text effects—everything you need to fine-tune your page to perfection.
- Free Software: Don't sleep on the free options. GIMP is a fantastic open-source alternative to Photoshop, and even a web-based tool like Canva can be surprisingly effective for basic panel layouts and lettering, especially when you're just starting out.
Comparing Free vs Paid Comic Assembly Software
Here’s a quick look at some popular software options for laying out panels and adding lettering to your AI-generated comic.
| Software | Cost | Key Features for Comics | Best For |
|---|---|---|---|
| Adobe Photoshop | Subscription | Advanced layering, custom brushes, powerful text tools, industry-standard CMYK support. | Professionals who need the most powerful and versatile tool available. |
| Affinity Photo | One-time purchase | Non-destructive editing, robust layer and text controls, excellent performance. | Creators looking for a professional-grade, non-subscription alternative to Photoshop. |
| GIMP | Free | Strong layer management, customizable interface, and extensive plugin support. | Hobbyists and creators on a budget who need a powerful, open-source editor. |
| Canva | Freemium | Simple drag-and-drop interface, pre-made templates, and a large font library. | Beginners who want an easy, web-based tool for simple page layouts. |
Ultimately, the right tool is the one that fits your budget and workflow. For most comic projects, any of these will get the job done well.
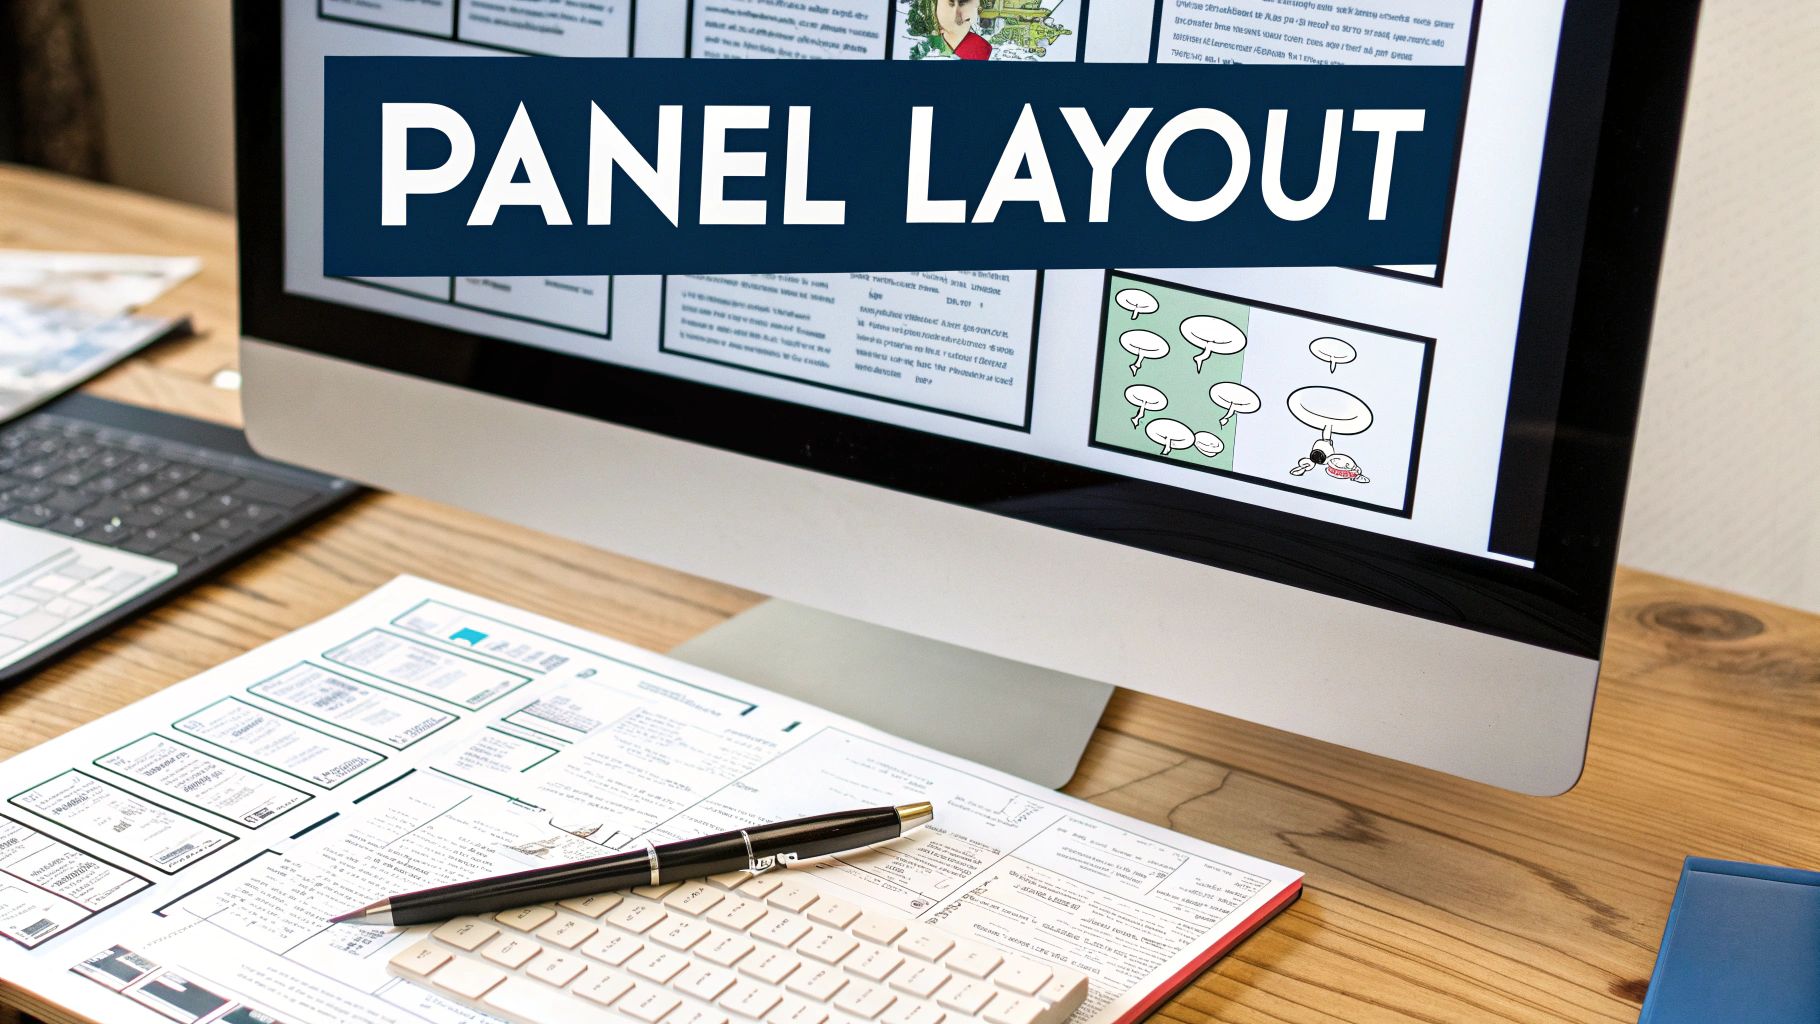
Guiding the Reader's Eye with Panel Layouts
How you arrange your panels is storytelling. The layout dictates pacing, builds suspense, and tells the reader where to look. No matter how incredible the art is, a confusing layout will lose your audience instantly.
When you're starting, a standard grid—like a simple two-by-three layout—is a great way to get comfortable. But don't be scared to break the rules to create an effect. A tall, narrow vertical panel can emphasize a dramatic fall. A wide, cinematic panel is perfect for an establishing shot of a new city.
Remember the "Z-Path": In Western comics, a reader's eye naturally moves across a page from top-left to bottom-right, almost in a Z shape. Arrange your most critical panels and speech bubbles along this natural path to make sure the story flows in the right order.
This is the bedrock principle of comic layouts. If you intentionally place key moments along this path, your comic will feel intuitive and effortless to read.
The Art of Comic Book Lettering
Lettering is an art form all its own. Clumsy, hard-to-read lettering can completely sabotage brilliant artwork. Your goal is to make the text feel like it’s a natural, integrated part of the visuals.
Choosing Your Fonts The font you choose sets the entire tone. For dialogue, a clean, sans-serif font like Blambot's Digital Strip or even Comic Sans MS (yes, really!) is a classic choice because it's incredibly easy to read. For sound effects—the "onomatopoeia"—go wild! This is your chance to use expressive, dynamic fonts that visually match the POW! or CRASH! you're trying to convey.
Crafting Speech Bubbles Your speech bubbles should be clean and unobtrusive. An oval shape works great for standard dialogue, while a cloud-like bubble with little circles leading to the character is the go-to for thoughts. The tail of the bubble should point directly at the speaker's mouth without covering up any important art.
Here are a few best practices to keep in mind:
- Placement is Key: Try to position bubbles in the "negative space" of your panels, like an empty patch of sky or a blank wall.
- Keep Text Brief: If a character has a long monologue, break it up into several smaller bubbles. This prevents a giant, intimidating block of text from overwhelming the panel.
- Use Bold and Italics: Add emotional weight and inflection to the dialogue by emphasizing certain words with bolding or italics.
When you nail the lettering, you elevate your project from a cool series of AI images into a legitimate comic book page that tells a clear, compelling story.
Publishing and Monetizing Your AI Comic
You’ve done it. After hours of prompting, editing, and lettering, your comic is finally complete. That's a massive win, but it doesn't have to be the final step. Let's talk about how to get your project out into the world, find an audience, and maybe even make some money.
Moving from creator to publisher is a shift in mindset. You start thinking about distribution, building a community, and finding a way to make it all sustainable. The good news is that the digital world has blown the doors wide open for indie creators. You no longer need a traditional publishing deal to get your work in front of readers.
The whole industry is changing, driven by digital platforms. The global comic book market was valued at USD 17.06 billion in 2024, and the digital slice of that pie—worth USD 5.20 billion—is growing fast. It's projected to expand at a CAGR of 9.4% through 2030, which tells you everything you need to know about where things are headed.
Choosing the Right Publishing Platform
Where you decide to post your comic is one of the most important decisions you'll make. It determines who sees your work. Different platforms have their own communities and preferred formats, so the goal is to find the one that fits your comic’s vibe.
Here are a few of the heavy hitters for indie creators:
- Webtoon: This is a dominant force in the webcomic scene, with over 80 million monthly active users. It’s built for the vertical-scroll format, which is perfect for reading on a phone. That massive, built-in audience is a huge leg up for discoverability.
- Tapas: Operating in a similar space to Webtoon, Tapas also favors the vertical-scroll format and fosters a really supportive community. It gives you a clear pathway to making money with features like "tipping" and premium episodes.
- Kickstarter: If you dream of holding a physical copy of your comic, Kickstarter is your best bet. It’s the perfect platform to crowdfund a print run, pre-sell copies, and build a base of dedicated supporters by offering exclusive rewards.
A quick glance at the Webtoon homepage shows you the kind of vibrant, character-driven stories that thrive there, especially in genres like romance, fantasy, and drama.
Building Your Audience from Scratch
Just uploading your comic and hoping for the best won't cut it. You have to actively build a community around your work. That means engaging with readers and promoting your comic wherever you can. Social media is your best friend here.
Set up dedicated accounts for your comic on Instagram, X (formerly Twitter), or TikTok. Post behind-the-scenes content, character art, and sneak peeks of upcoming pages. When people comment, reply! Engaging directly is how you build a loyal following that feels truly invested in your story.
Pro Tip: Don’t just post your comic and disappear. Ask your readers questions, run polls about character decisions, and share your creative process. Making them part of the journey is the fastest way to turn casual readers into dedicated fans.
Exploring Monetization Avenues
Once you've got an audience, you can start thinking about how to earn some income from your creation. For creators ready to turn their AI comic into a sustainable project, looking into different strategies for monetizing your webcomic is the logical next step.
Here are a few of the most common models:
- Advertising Revenue: Platforms like Webtoon and Tapas often have ad-share programs for creators who meet specific viewership numbers.
- Patreon or Subscriptions: Give your biggest fans a reason to support you directly. Offer exclusive perks like early access to pages, concept art, or process tutorials for a monthly subscription.
- Merchandise: Got cool characters? Put them on stuff! Sell prints, t-shirts, or stickers featuring your best artwork.
- Selling Digital or Physical Copies: Use a platform like Gumroad to sell high-resolution PDF versions, or use Kickstarter to fund a full print run.
Before you start selling anything, you have to do your homework on the legal side. Every AI tool has different terms of service about commercial use. You need to be 100% sure you have the right to profit from the images you’ve generated. For a deeper dive on this, check out our guide on navigating AI image usage rights. It’ll help ensure your new venture is built on a solid foundation.
Your Top Questions About AI Comic Generators, Answered
Jumping into AI comics for the first time brings up a ton of questions. It's a new frontier, whether you're a seasoned artist or a writer finally getting to visualize your stories. It’s totally normal to wonder about the process, the legal side of things, and whether the final quality will be any good.
This is your go-to guide for those nagging questions. We'll cut through the noise on copyright, tackle the tricky problem of keeping your art style consistent, and figure out where these tools actually fit into a real creative workflow. Getting these answers sorted out now means you can create with confidence instead of headaches.
Can I Actually Sell a Comic I Made with an AI Generator?
This is the big one, right? The short answer is yes, but it all comes down to the tool you use. Your chosen comic book generator’s terms of service is the ultimate rulebook here. Most of the time, especially with paid platforms, you're granted full commercial rights to whatever you create.
That said, some free or research-based models might have non-commercial clauses buried in the fine print. You absolutely have to do your homework and understand the licensing agreement before you even think about monetizing your comic.
- Dig into the Terms: Look for a "Commercial Use" or "Licensing" section on the platform's website. It’s a must-read.
- Keep Your Receipts: It’s a good practice to save a record of the tool you used and its terms at the time you created the work.
- A Note on Copyright: The legal world is still catching up. As it stands, individual AI-generated images often can't be copyrighted in the same way as human-made art. However, your finished comic—your unique story, character arcs, panel layouts, dialogue, and lettering—is a combined creative work that can be protected.
How Do I Stop My Art Style from Changing Every Panel?
Keeping a consistent style is, without a doubt, the biggest technical hurdle you'll face. AI models love to drift between aesthetics if you give them an inch. The secret is to lock them down with a rigid, non-negotiable set of instructions in every single prompt.
Your two best friends for this are a style call sign and a character call sign.
The style call sign is a specific string of keywords that defines your comic's entire visual DNA (e.g., in the style of Mike Mignola, heavy inks, dramatic shadows, pulp horror aesthetic). You have to paste this exact phrase into every single prompt for every single panel. This constant repetition stops the AI from improvising and trying out some new style it just learned about.
Think of your style keywords as a creative straitjacket for the AI. You're deliberately limiting its options to ensure every panel feels like it belongs in the same universe. This control is what separates a professional-looking comic from a random assortment of images.
Is Using an AI Comic Book Generator Cheating?
Not at all. An AI comic generator is a tool, just like a Wacom tablet, Photoshop, or a pencil. It doesn't write the story, design the characters from scratch, or handle the critical work of pacing, paneling, and lettering. You are still the director, the writer, and the editor.
These generators are just automating one part of a massive creative pipeline: the manual rendering of an image. You’re providing the vision, the narrative, and all the specific details. The AI is just an incredibly fast (and sometimes quirky) illustrator that’s following your art direction to the letter.
This tech is opening doors for a whole new wave of creators. The global comic book market was valued at USD 16.83 billion in 2024 and is on track to hit USD 26.75 billion by 2032, with indie creators fueling a huge part of that growth. Just look at a platform like Webtoon, which reported over 100,000 creators in 2024—proof that new tools are making it possible for more people to tell their stories visually. For a deeper dive, you can find more comic book market insights on Fortune Business Insights.
By taking on the time-consuming labor of illustration, these generators let writers and storytellers who can't draw bring their worlds to life in a way that was never possible before.
Ready to stop wondering and start creating? With over 50 unique art styles and powerful editing tools, ai-media-studio gives you everything you need to build your comic from the ground up. Start for free and bring your story to life today at https://ai-media-studio.com.