So, you want to start using an AI image generator? The basic idea is simple: you sign up, head to the creation space, type out a description, pick a style, and hit ‘generate.’ In seconds, your idea pops into existence as a unique image. The real art, though, is in tweaking your descriptions—your prompts—to get the exact result you have in mind.
Navigating Your First AI Image Generator
Jumping into an AI image generator for the first time can feel a bit like staring at a spaceship's control panel. There are buttons and sliders everywhere. But here's the good news: you only need to know a few key controls to get off the ground. Forget all the complex jargon for now. The goal is just to go from a blank screen to a cool visual without getting bogged down in the settings.
Getting Started on the Platform
Your creative journey starts with a quick account setup. Most platforms, including our own AI Media Studio, have a simple sign-up that drops you right into the main workspace. Think of this as your digital art studio.
Here, you'll find a few core components that you’ll use over and over again.
Before you start typing, it helps to know what you're looking at. Most platforms, no matter how different they seem, are built around the same few essential tools.
Your Core Toolkit at a Glance
This table breaks down the main features you’ll find on almost any AI image generator's dashboard. Get familiar with these, and you'll be ready to create on any platform.
| Tool | What It Does | Typical Location |
|---|---|---|
| The Prompt Box | This is your direct line to the AI. You type your creative ideas in here. | Usually the most prominent text field on the screen. |
| Style Selectors | Lets you choose the overall look and feel, like Photorealistic, Anime, or Watercolor. | Often displayed as a clickable gallery or dropdown menu. |
| The Generate Button | The big red button! This command brings your prompt and style choices to life. | Typically located right next to or below the prompt box. |
These three elements are the heart of the machine. Master them, and you're 90% of the way there.
The rapid growth of these tools is completely changing the creative world. In fact, the global AI image generator market jumped from $257 million in 2022 to nearly $300 million in 2023. It’s not just a fad; this technology is becoming a fundamental part of the creative process.
Don’t overthink your first few attempts. The best way to learn is by doing. Your first goal isn't to create a masterpiece, but to see how your words directly influence what the AI spits out. Play around and have fun with it!
Once you’re comfortable, you can explore more specialized tools. For instance, a fashion AI generator can open up incredible possibilities for designers. Broadening your knowledge of the different AI image creation tools out there will also give you a better sense of what's possible. But for now, stick with the basics, and you'll be making amazing visuals before you know it.
Writing Prompts That Bring Your Ideas to Life
The quality of the images you get from an AI is almost entirely down to the quality of your prompts. Learning to "speak" the AI's language is probably the single most important skill you can develop. It’s the difference between a generic picture of "a car" and a breathtaking shot of "a vintage red convertible driving along a coastal highway at sunset, cinematic lighting, photorealistic."
I find it helps to think of a prompt not as a single command, but as a recipe. The more precisely you define each ingredient, the closer the final dish will be to what you imagined. Just telling the AI the main subject isn't nearly enough—you need to build an entire scene around it.
The Anatomy of a Powerful Prompt
A really effective prompt usually has several layers of detail. You won't always need every single one, but learning to combine them gives you incredible control over the final image. Each piece of the puzzle answers a specific question for the AI.
- Subject: Who or what is the star of the show? Get specific. Don't just say "a dog," try "a golden retriever puppy."
- Action: What’s the subject doing? Is it "sitting," "running through a field of wildflowers," or "chewing on a squeaky toy"?
- Environment: Where is all this happening? Set the scene. Is it "on a modern leather sofa" or "in a sun-drenched, misty forest"?
- Mood & Lighting: What's the vibe? Words like "serene," "dramatic," or "mysterious" work wonders. Lighting cues are your secret weapon—think "golden hour," "neon glow," or "soft morning light."
- Artistic Style: What should it look like? This is where you call your shot: "oil painting," "3D render," "anime style," or a classic "black and white photograph."
For example, a beginner might just type "a man in a library." But someone who's spent time with these tools knows they can get something far more compelling: "An elderly scholar with spectacles, examining a rare manuscript, in a vast, dimly lit Victorian library with towering bookshelves, moody atmospheric lighting, oil painting." That level of detail leaves no room for guessing and points the AI exactly where you want it to go.
Adding Advanced Directives
Once you've got the basics down, you can start adding more technical or artistic instructions to really dial things in. Think of these as giving camera directions to a photographer.
Consider adding these advanced elements to your toolkit:
- Camera Angle: Define the viewpoint. Are you looking for a "drone shot" from above, a dramatic "low-angle shot," or an intimate "macro close-up"?
- Lens & Detail: You can even mention camera specifics. A "telephoto lens" can compress the background, while a "wide-angle lens" makes a scene feel huge. Adding phrases like "highly detailed" or "4K resolution" nudges the AI to pack in more texture and sharpness.
The real secret to mastering prompts is iteration. Your first try is just a starting point. See what the AI gives you, then tweak your prompt—add a detail, remove a word, or rephrase something to get closer to what's in your head. Every generation is a learning opportunity.
By layering these details, you shift from being a passive user to an active director of the AI's creative process. If you want more inspiration on structuring your commands, checking out some well-crafted AI image prompt examples is a fantastic way to get the ideas flowing.
Choosing a Visual Style to Match Your Vision
Once your prompt is locked in, the real artistry begins with choosing a visual style. Think of this as the mood, the medium, and the entire vibe of your image, all rolled into one. The right style is what turns a simple description into something that truly connects with an audience.
Every idea has a feeling, and today’s AI tools give you a massive library of styles to capture it perfectly. You can jump from hyper-realistic photos that look like they were shot on a high-end DSLR to whimsical watercolor paintings or crisp vector graphics. This choice completely steers the final output.
Take a simple prompt: "a lone lighthouse on a stormy coast." This can be rendered in countless ways depending on the style you apply.
- Cyberpunk Neon: The scene is suddenly drenched in electric blues and purples, maybe even adding a few futuristic details to the lighthouse itself.
- Dramatic Black and White Photography: This style would focus on the raw textures and stark contrast, creating a timeless and powerful image of the storm.
- Whimsical Children's Book Illustration: The same scene becomes soft, friendly, and inviting, with rounded edges and a cozy, storybook feel.
Aligning Style with Your Goal
Your choice of style should always come back to your goal. What are you trying to achieve?
If you're creating a professional brand asset, you’ll want something clean and modern. A photorealistic or minimalist graphic design style would be a fantastic fit. But if you’re making a piece of personal art to hang on your wall, maybe an oil painting or vintage comic book aesthetic is what you’re after.
This incredible flexibility is why the technology is exploding. The AI image generator market is on track to hit USD 8.7 billion in 2024, with some projections showing it could climb to USD 60.8 billion by 2030. Industries like fashion are already using these tools to conceptualize designs and cut down on production costs, proving just how powerful it is to match the right style to the right purpose. You can explore more about these industry trends to see how AI visuals are already making a huge impact.
Blending Styles for a Unique Aesthetic
Here’s where the real fun begins. You don't have to be limited to a single, predefined style. The magic happens when you start mixing and matching stylistic elements right inside your prompt to create a look that’s uniquely yours.
Instead of just selecting the "Anime" style from a dropdown, you could write a prompt that specifies, "…in the style of a 1990s sci-fi anime, with grainy film texture and soft pastel colors." This gives the AI much more specific direction, blending several aesthetic cues into a single, cohesive vision.
Pro Tip: When you’re blending styles, get descriptive. Reference artists, art movements, or specific techniques in your prompt. Adding phrases like "inspired by Van Gogh's brushstrokes" or "with the clean lines of vector art" can produce some truly fascinating and specific results.
Experimenting with these combinations is how you really get good at this. Each new style and blend teaches you more about how the AI interprets creative direction, building up your toolkit for future projects. Don’t be afraid to try weird pairings—that’s often where the most exciting images come from.
Refining Your Images with Advanced Tools
The first image the AI spits out is rarely the final cut. Honestly, it’s best to think of it as a creative starting point—a beautiful, raw block of marble just waiting for you to chisel it into a masterpiece. The real magic happens when you start refining it, using advanced editing tools to turn a good image into a great one. These features give you incredible control, letting you perfect your vision without ever having to jump over to another program.
And this space is absolutely exploding. The global AI image generator market is expected to rocket from USD 9.10 billion in 2024 to an incredible USD 63.29 billion by 2030. A huge driver of that growth? The powerful editing tools that are now accessible to everyone, not just professional designers. You can see more about these exciting market trends here.
Fixing Imperfections with Inpainting
For any targeted fixes, Inpainting is your best friend. It lets you select a very specific part of an image and tell the AI to regenerate just that little piece based on a new prompt. This is a game-changer for correcting those weird little quirks AI can produce or for adding new creative elements on the fly.
Let’s say you generated the perfect street scene, but there’s a random, distracting person photobombing your shot in the background. With inpainting, you just "paint" right over them and tell the AI to fill the space with "cobblestone street." The AI will work its magic, seamlessly blending the new texture right into the existing image.
Here are a few other times inpainting really saves the day:
- Adding Objects: You have a clean shot of a work desk but decide it needs a prop. Just select an empty spot and prompt "a steaming ceramic coffee mug."
- Correcting Flaws: AI models are notorious for messing up hands. You can select a hand with six fingers and prompt "a realistic human hand with five fingers."
- Removing Distractions: That beautiful landscape you created is perfect, except for a misplaced sign. Paint over it and let the AI fill it in with more "lush green grass."
Expanding Your Canvas with Outpainting
While inpainting works inside the frame, outpainting expands the world outside of it. This tool, sometimes called "generative fill," lets you stretch the canvas of your image in any direction, and the AI will intelligently create what it thinks should be there.
Outpainting is like having a zoom-out button for a photo you've already taken. It’s a powerful way to reframe your subject or instantly turn a tight portrait into a sweeping panorama.
For instance, you might have a close-up portrait that you love, but you need a full-body shot for a website banner. By expanding the canvas downwards, the AI can generate the rest of the person's body and their surroundings, all while perfectly matching the original lighting and style. That cozy little cottage you generated? It can now be part of a vast, sprawling landscape.
This simple diagram shows the creative flow, from your initial idea to the final, styled image.
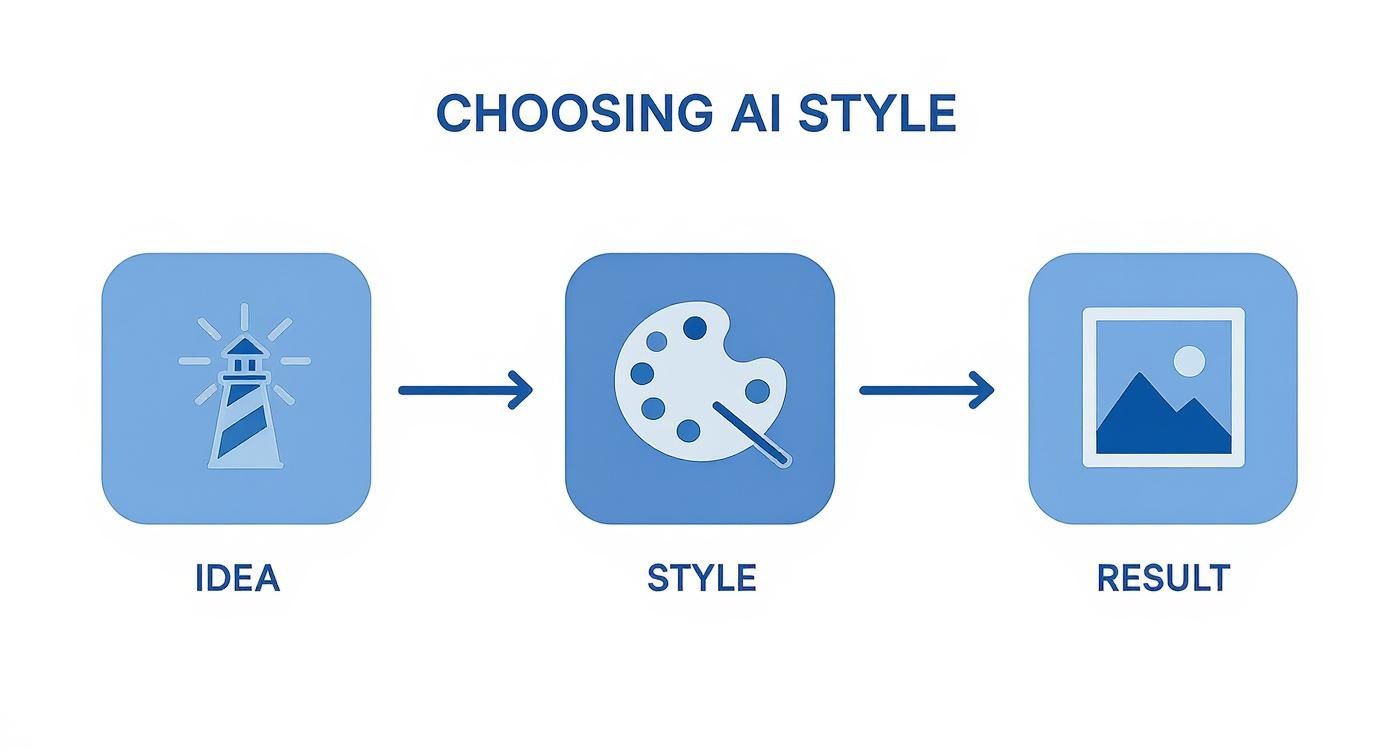
As you can see, your idea, combined with a chosen style, directly informs what the AI creates. From there, you can use these editing tools to get it just right.
Final Touches for a Professional Finish
Beyond the big edits, you’ll find plenty of tools for those crucial final adjustments. Upscaling is an absolute must if you plan on printing your work. It increases the image's resolution, adding detail and sharpness so it looks crisp and clear, even when blown up to a large size.
You can also make subtle tweaks to color, brightness, and contrast right here in AI Media Studio. These built-in controls save you the hassle of exporting to a different photo editor just for minor changes.
If you want to go even deeper on getting the absolute best results, check out our full guide to improve image quality. Getting comfortable with these final touches is what truly elevates your creations from "AI-generated" to "professionally designed."
Putting Your AI-Generated Images to Use
You’ve tweaked the prompt, played with styles, and now you have the perfect image. What's next? Getting that creation out of the studio and into the real world.
Making a stunning visual is half the battle; the other half is using it effectively. Your first move is to export it, and that means choosing the right file format.
This decision matters more than you might think, as it directly affects both image quality and how fast your pages load. For most web-based projects—think blog posts, social media, or website heroes—JPG (or JPEG) is your go-to. It does a great job of compressing the file size, which helps your website load faster and keeps visitors from bouncing.
But what if your image has a transparent background? If you're working with a logo or an icon that needs to sit on top of a colored background, you absolutely need a PNG. This format keeps that transparency intact and typically delivers slightly sharper quality, which is crucial for brand assets.
Navigating Image Rights and Commercial Use
Before you splash that new image all over your next big marketing campaign, we need to talk about ownership. Honestly, this is one of the most confusing parts of using AI image generators, and the answer is almost always buried in the platform’s terms of service.
Here at AI Media Studio, we keep it simple: our paid plans give you full commercial rights. That means you can use your creations for your business without a second thought. Be careful, though, as many free tools have very restrictive non-commercial clauses.
Always, always check the terms. Just assuming you have commercial rights can get you into legal hot water, especially if that image becomes a key part of your brand or ends up on products you sell.
Integrating Your Visuals Seamlessly
Once your image is downloaded and you're clear on the rights, it’s time to get organized. I find it incredibly helpful to create a simple folder system for all my AI-generated visuals, usually sorted by project or style. It saves a ton of time later and stops my gallery from turning into a digital junk drawer.
When you add these images to your content, remember that context is everything. A visual should support and enhance your text, not just act as decoration.
If you really want to take your content to the next level, you should look into mastering dynamic image generation, which lets you personalize visuals for different people automatically. By thoughtfully weaving your AI art into your work, you make sure all that creative effort pays off and actually makes an impact.
Common Questions About Using AI Image Generators
As you start getting the hang of an AI image generator, you’re bound to hit a few snags. It’s a totally normal part of the process, so don’t get frustrated. Let's walk through some of the most common questions and roadblocks we see, so you can get back to creating.
Lots of new users feel that initial disappointment when the image in their head doesn't quite translate to the screen. We've all been there. Here’s why that happens and what you can do about it.
Why Do My Images Look Nothing Like My Prompt?
This is, without a doubt, the most common hurdle. Nine times out of ten, it’s because the prompt is either too vague or way too complex.
If the AI seems to be misinterpreting your idea, try stripping it back. Start by clearly describing your main subject. Once you have that locked in, you can gradually layer in details about the setting, the action, and the mood.
Sometimes, just rephrasing your request can make all the difference. For instance, instead of "a forest at night," you could try "a dense pine forest under a full moon, with silvery light filtering through the canopy." Think of it like a conversation—if the AI doesn’t get it one way, ask in another.
How Can I Create a Consistent Character?
Getting the same character to show up in different images is one of the trickier parts of AI generation, but it's not impossible. One of the best methods is to use a "seed" number if the tool you're using supports it. By reusing the same seed with slightly different prompts, you tell the AI to keep the core composition and style similar.
Another powerful technique is to get hyper-specific in your character descriptions and use them every single time. Define unique, memorable details like "a woman with fiery red hair in a high ponytail, wearing a black leather jacket and silver hoop earrings." The more distinct identifiers you feed the AI, the better it can latch onto that specific person.
When you find a prompt that creates a character you love, save it! Having a library of successful character descriptions is a huge time-saver and the best way to build consistency in your projects.
What Should I Do About Weird Hands or Distorted Faces?
Ah, the infamous AI hands. Artifacts like extra fingers or slightly warped faces are a notorious quirk of many models. The best approach here is usually an iterative one. Your first move? Just regenerate the image. Sometimes it's just a bad roll of the dice.
If that doesn't work, it's time to bring in negative prompts. Add phrases like -deformed hands, -extra fingers, -blurry face to your prompt to give the AI explicit instructions on what not to create. For small flaws in an otherwise perfect image, the inpainting tool is your secret weapon. You can select just the messed-up area and tell the AI to regenerate it with a specific command like "a perfectly rendered human hand with five fingers."
Can I Use These Images for My Business?
This is a critical question, and the answer really depends on the platform you're using. Paid plans on services like ours typically grant you full commercial rights to whatever you create. However, many free tools or research previews have strict non-commercial use clauses.
Before you use an image in any marketing materials, on a product, or for any business purpose, always read the terms of service. It’s a simple step that can save you from a major legal headache down the road.
Ready to move past the learning curve and start creating stunning visuals with confidence? With AI Media Studio, you get powerful tools, full commercial rights on our paid plans, and an interface designed to bring your ideas to life without the hassle. Create your free account today and see what you can make!