To generate an image with AI, you just type what you want to see into a tool, and a few seconds later, you have a completely unique visual. This is a huge deal for creators, marketers, and anyone running a business. Suddenly, you can produce high-quality visuals for your blog, social media, or ads without needing a lick of design skill.
Why AI Image Generation Is a Creator's New Superpower
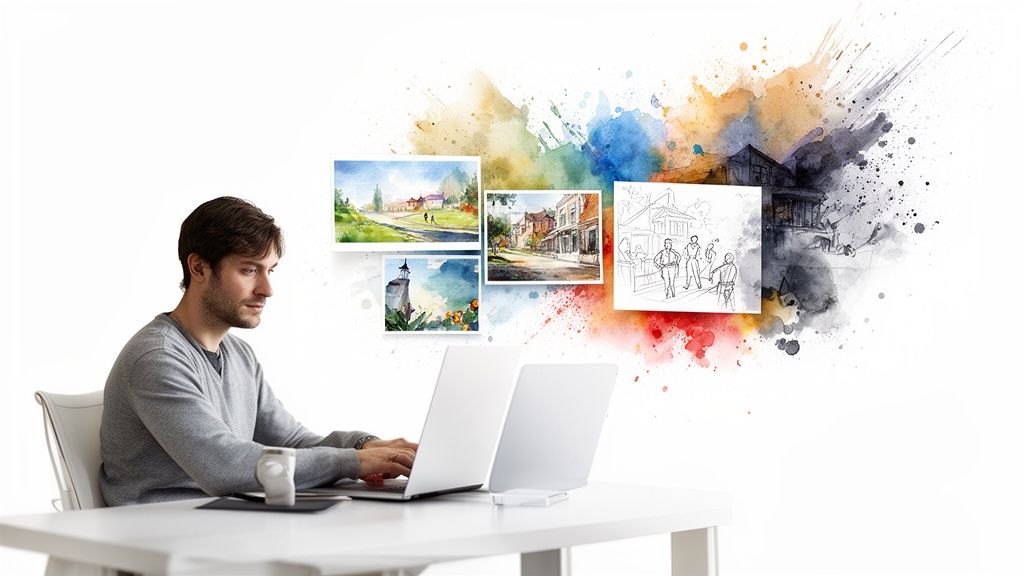
Forget the hype for a second. AI image generation isn't just a fun trend; it's fundamentally changing how creative work gets done. It’s leveling the playing field, giving solo entrepreneurs and small teams the power to create visuals that can compete with big companies and their in-house design departments.
This whole movement is about making visual content creation accessible to everyone. Instead of scrolling for hours through stock photo sites hoping to find something that kinda fits, you can now create the exact image you're picturing in your head. That opens up a world of new possibilities for branding and telling your story.
The Shift from Searching to Creating
The old way was a grind of searching, compromising, and settling for "good enough." Now, the process is all about ideation and creation. You can whip up visuals for any scenario you can dream up, whether it's a header for a blog post or an entire social media campaign.
This isn't just about saving time—it’s about having precise, granular control over your brand's visual identity. For instance, you can:
- Illustrate Complex Ideas: Generate an image that perfectly explains an abstract concept or makes data easier to understand.
- Maintain Brand Consistency: Create a whole suite of images that share a specific style, color palette, and mood.
- Boost Engagement: Unique, eye-catching images stop the scroll and make your content stick in people's minds.
The real magic of AI image generation is how it turns a simple idea into a professional-grade asset almost instantly. It closes the gap between concept and creation, letting you experiment and tweak things on the fly.
The Growing Market and Creator Opportunity
This creative boom is backed by some serious numbers. The AI image generator market was valued at USD 418.5 million in 2024 and is expected to explode to USD 2,633.2 million by 2035.
This explosive growth means the tools are only getting more powerful and easier to use. The features of AI image generation platforms like ours at https://www.ai-media-studio.com/features/image-generation are constantly evolving, offering more styles and finer controls.
To keep up with what's new and what's working, it helps to explore diverse articles and insights on AI image generation. This technology has officially moved from a novelty to an essential part of the modern creator's toolkit.
Choosing the Right AI Tool for Your Creative Vision
With a flood of AI image generators hitting the market, picking the right one can feel like a chore. The trick is to tune out the noise and technical jargon. Instead, focus on what actually impacts your creative work: ease of use, stylistic range, and the specific features you need to get the job done.
The best tool for you will feel less like a piece of software and more like a creative partner. Start by looking at the user interface. A platform like AI Media Studio is designed with a clean, intuitive layout, letting you jump straight into creating without needing a degree in prompt engineering. If you're a marketer or content creator, you need to move from idea to finished image in moments, not hours.
Your time should be spent creating, not fighting with the tool.
Evaluating Key Features for Creators
Beyond a simple text box, the real power lies in the features that give you genuine creative control. A rich library of pre-set styles is non-negotiable. You should be able to instantly pivot between photorealistic, anime, watercolor, or cyberpunk aesthetics to match your project's vibe.
Then, think about the practical side of things. Does the tool let you download high-resolution images suitable for print or massive web banners? Can you perform more advanced edits like inpainting (changing just one part of an image) or outpainting (expanding the canvas)? These aren't just high-end perks anymore; they're becoming standard.
The insane pace of development, fueled by massive investment, is making once-exclusive features available to everyone. Powerful editing capabilities are no longer locked away in expensive, enterprise-level software.
This shift is happening because of the sheer amount of money pouring into the industry. For example, private investment in generative AI hit a staggering $33.9 billion in 2024 alone. That capital injection is what allows platforms to integrate sophisticated models and features, opening up professional-grade tools for creators everywhere. For a deeper look at this trend, you can read the full AI Index report from Stanford.
When you're trying to decide on the right AI image generator, it helps to compare the core features that truly matter for creative and commercial work. Here's a breakdown of what to look for and why it's so important.
AI Image Generator Feature Comparison
A comparison of essential features to consider when selecting an AI image generation tool for creative and commercial projects.
| Feature | What to Look For | Why It Matters for Creators |
|---|---|---|
| User Interface (UI) | An intuitive, clean layout with minimal learning curve. | A good UI lets you focus on creativity, not on learning complex commands. It accelerates your workflow from idea to final asset. |
| Style Library | A diverse collection of pre-set styles (e.g., Photorealistic, Anime, 3D). | Quickly generates on-brand or project-specific visuals without needing to craft complex style prompts from scratch. |
| Advanced Editing | Inpainting, outpainting, and image-to-image capabilities. | Gives you surgical control to fix errors, add elements, or expand canvases, reducing the need for post-processing in other software. |
| High-Resolution Output | Options to export images at 2K, 4K, or higher resolutions. | Essential for any professional use case, from high-quality web graphics to print materials, ensuring your work looks sharp everywhere. |
| Commercial License | Clear, unambiguous terms granting you full commercial usage rights. | This is non-negotiable. It provides the legal confidence to use your creations in ads, products, and client work without risk. |
| Team Collaboration | Features for shared workspaces, prompts, and asset libraries. | Crucial for agencies and in-house teams to maintain brand consistency, share inspiration, and manage projects efficiently. |
Having this checklist in mind helps you cut through the marketing hype and focus on the practical capabilities that will actually help you create better work, faster.
Free Trials Versus Paid Subscriptions
Most platforms dangle a free trial, which is the perfect way to kick the tires. Use this time to test the generation speed, check the image quality, and just get a feel for the overall experience. For any serious or professional work, though, you’re almost certainly going to need a paid plan.
When you're comparing subscriptions, look past the price tag and focus on these critical elements:
- Commercial Use Rights: This is the big one. Make absolutely sure you have the legal right to use your creations for business, whether that’s for ads, products, or client projects.
- Credit System: Get a clear understanding of how many images you can create. Do you get a monthly allowance? Do unused credits roll over? This determines the real value you get.
- Team Collaboration: If you work with others, look for features that support shared workspaces and assets. This saves a massive amount of time and keeps everyone on the same page.
By zeroing in on these practical points, you can confidently pick an AI tool that not only works for your budget but genuinely elevates what you’re able to create. If you want to see a head-to-head breakdown, you might be interested in comparing AI image generation tools to see how the top options stack up.
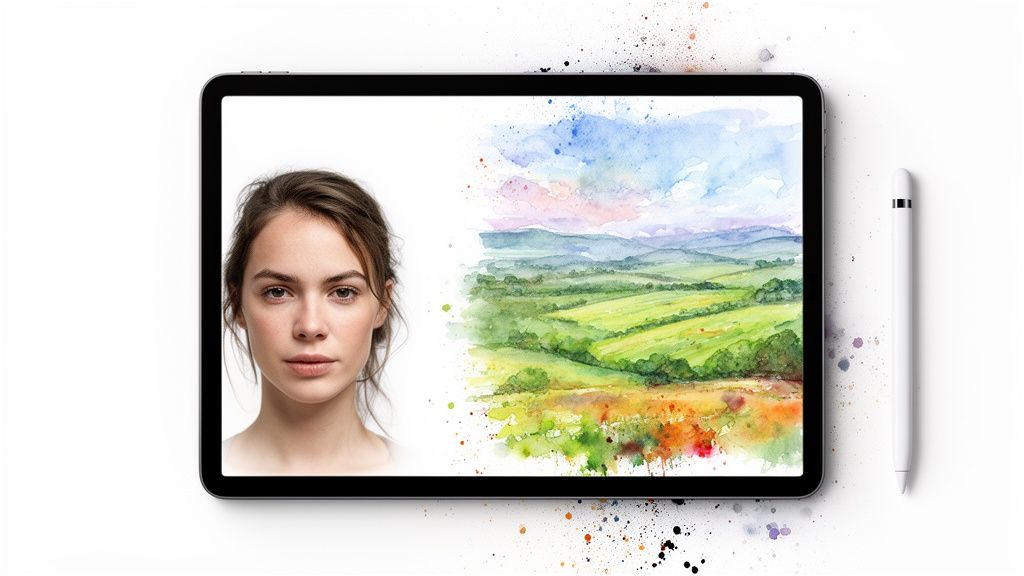
Crafting Prompts That Bring Your Ideas to Life
The quality of the images you get from an AI model comes down to one thing: the quality of your prompt.
Think of yourself as a director and the AI as your massively talented, but very literal, production crew. Your prompt is the script, giving them explicit instructions. A simple phrase gets you a simple image, but a detailed, layered prompt is what produces a masterpiece.
The best prompts are built from several key components. You always start with the subject—the main focus of your image. From there, you layer on descriptors for style, composition, and lighting to guide the AI’s creative choices. Each element you add gives you more control, taking you from a generic, unpredictable output to something that truly matches the vision in your head.
The Anatomy of a Powerful Prompt
To generate images that really stand out, you need to learn to think in layers. A great prompt doesn't just name an object; it paints a complete scene for the AI to interpret.
Let’s break down the essential building blocks:
- The Subject: Be specific. Don't just say "a dog." Instead, try "a scruffy Jack Russell terrier puppy with floppy ears and a curious expression." The more detail, the better the result.
- The Style: Define the artistic direction. Using words like "photorealistic," "watercolor painting," "3D render," or "classic anime sketch" tells the AI exactly what aesthetic you're aiming for.
- The Composition: Control the virtual camera. Use terms from photography like "wide-angle shot," "dramatic close-up portrait," or "shot from a low angle" to frame your subject precisely.
- The Lighting: Set the mood. Descriptors like "cinematic lighting," "soft golden hour light," or "dramatic neon glow" have a massive impact on the final feel of the image.
The most common mistake I see is people being too vague. The AI can't read your mind, so your prompt needs to be an explicit blueprint of the image you want. Every detail you add refines the result and reduces the randomness.
Using Negative Prompts for Precision Control
Just as important as telling the AI what you want is telling it what you don’t want. This is where negative prompts come in, and they're a game-changer for getting professional results. They act as a filter, removing unwanted elements and cleaning up common AI mistakes.
For instance, if you're trying to create a photorealistic portrait, you might notice the AI generates weird artifacts or messes up the hands—a classic AI quirk. A negative prompt is the perfect tool to fix this.
Let's look at a real-world scenario:
- Initial Prompt:
Photorealistic portrait of a woman smiling - The Problem: The result looks okay, but the hands are poorly rendered and the background is a blurry mess.
- Revised Prompt:
- Positive Prompt:
Photorealistic portrait of a smiling woman, detailed eyes, soft lighting - Negative Prompt:
blurry, deformed hands, extra fingers, cartoon, disfigured, ugly
- Positive Prompt:
This two-part approach gives you incredible precision. You guide the AI toward your vision while simultaneously steering it away from common flaws, ensuring a much cleaner and more professional-looking final product. The infographic below shows how this fits into the broader process, starting with selecting the right tool for the job.
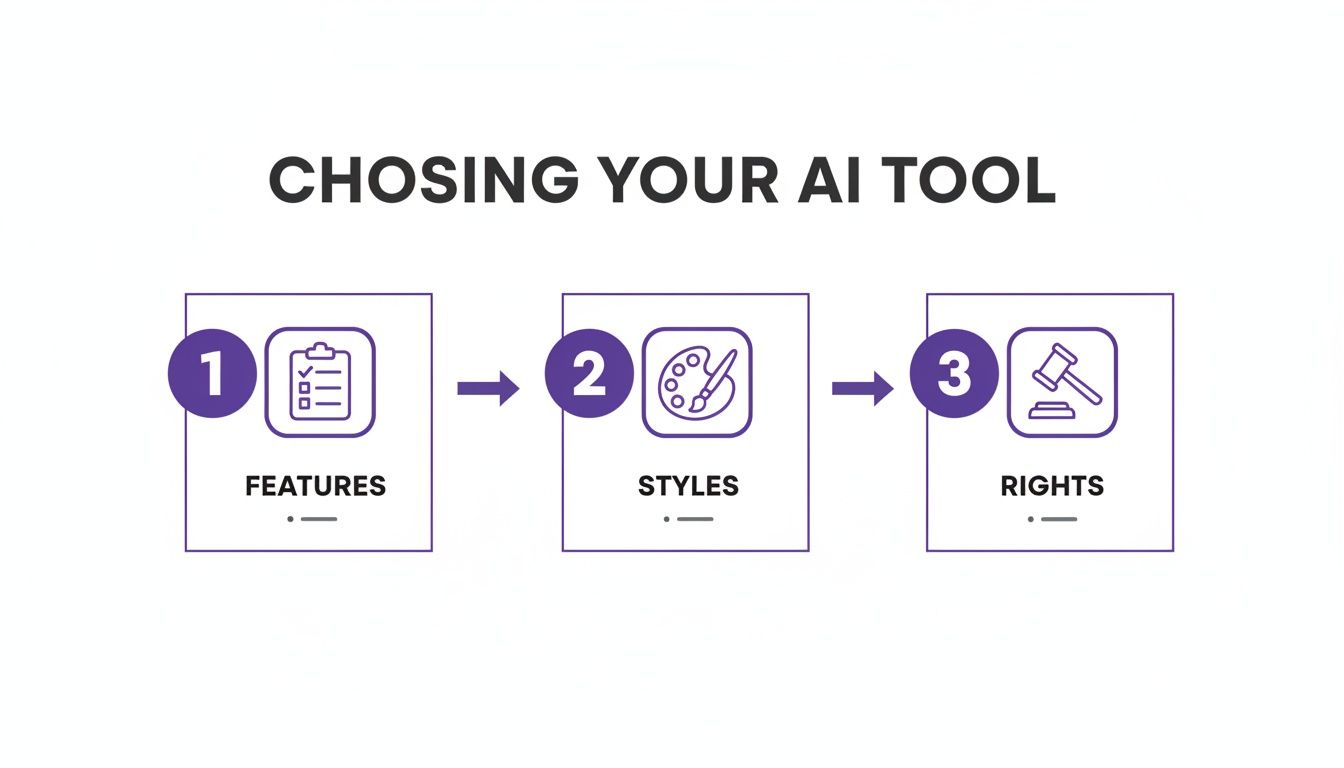
As you can see, thinking about a tool's features, style variety, and commercial rights before you even start prompting is the foundation for a successful creative workflow.
Taking Your AI Images from Good to Great with Editing
Let's be honest: the first image an AI spits out is almost never the final masterpiece. Think of it as a fantastic starting point—a high-quality draft that's ready for you to shape and perfect. This is where you shift from simply prompting to truly directing.
The real control comes from using post-generation editing features to refine, correct, and expand on what the AI gave you. This is where features like inpainting and outpainting become absolutely essential, especially if you're creating images for professional use. They give you the precision needed to nail your vision.
Correct and Create with Inpainting
Inpainting is your secret weapon for making surgical edits inside the image. It lets you select a specific area and feed the AI a new prompt to regenerate only that section, leaving everything else untouched. It's incredibly powerful for fixing those little imperfections or even adding entirely new elements.
Imagine your AI generates a perfect shot of a cozy office, but there’s some weird, distracting object on the desk. With inpainting, you just mask that object and tell the AI to replace it with a “stack of vintage books.” Problem solved.
Here’s how you’ll probably use it:
- Fixing Flaws: This is the big one. Correcting mangled hands, weird facial features, or other common AI artifacts without having to re-roll the entire image is a lifesaver.
- Adding Details: Want to place a steaming mug of coffee on an empty table? Or add a subtle reflection to a pair of sunglasses? Inpainting makes it easy.
- Swapping Elements: You can change a character's shirt from red to blue or update the packaging on a product in a lifestyle shot.
Using a capable AI image editor that has these features baked in is what separates a good workflow from a great one.
Expand Your Canvas with Outpainting
While inpainting works within the frame, outpainting (sometimes called "uncropping") expands your canvas outward. It intelligently generates new content beyond the original borders, perfectly matching the style and context of the existing image. This is a game-changer for repurposing visuals.
For instance, you could take a perfectly composed square image made for Instagram and use outpainting to extend it into a wide 16:9 banner for your website's hero section. The AI will seamlessly build out the landscape or background, creating a much larger, cohesive scene.
Outpainting gives you the freedom to reimagine your image's composition after it's been created. It’s like discovering your photo was just a small piece of a much larger, more detailed world.
This market is exploding, with some projections showing the global AI image generator market hitting $917.448 million by 2030. This growth is driven by technologies that can slash media production costs by up to 80%, making advanced tools like outpainting accessible to everyone. If you want to dig into the numbers, check out the full market analysis from Fortune Business Insights.
Final Touches for Professional Polish
Finally, don't sleep on the basics of resolution and optimization. Most professional tools let you upscale your final image to 2K or 4K, making sure it looks crisp on high-resolution screens or in print.
Once you have that high-res file, it's crucial to learn how to compress images without losing quality. This is a must-have skill for keeping your website's load times fast. Simple adjustments to color, contrast, and saturation can also make a huge difference, helping the image align perfectly with your brand's look and feel.
Navigating Commercial Use and Image Licensing
You just spent the last hour tweaking a prompt, and you've finally nailed it. The perfect image is staring back at you, ready to be the hero of your new ad campaign. But hold on—can you actually use it for your business?
This is one of the most critical questions in the world of AI art, and the answer isn't always a simple yes or no. The legal right to use an AI-generated image for profit hinges entirely on the terms of service of the platform you used. Ownership isn't automatic, and skipping the fine print is a recipe for legal headaches down the road. Understanding the licensing model is just as important as crafting the perfect prompt.
Many free or trial versions of AI tools come with a massive catch: the images you create are often for personal, non-commercial use only. This means you can show them off on your personal social media, but you absolutely cannot use them for ads, merchandise, or anything else intended to make money.
Understanding Different License Models
As you start exploring different AI image generators, you'll run into a few common types of licensing agreements. Each one offers a different level of freedom and has its own set of rules you'll need to follow.
Here’s a quick rundown of what you'll likely encounter:
- Full Commercial Rights: This is the gold standard for any business or professional creator. It gives you broad permission to use the images for any commercial purpose, including marketing, product sales, and client projects. This is almost always a feature of paid subscription plans.
- Creative Commons (CC): Some platforms might release images under a Creative Commons license. The details here are everything—some CC licenses allow commercial use, while others forbid it or require you to give credit (attribution) to the platform.
- Royalty-Free: This model usually means you pay once, typically through a subscription, and can then use the image multiple times for various projects without paying extra royalties. Still, you need to double-check for any restrictions on how and where you can use it.
The core takeaway is simple: if you plan to make money with your AI-generated images, you must choose a tool that explicitly grants you a commercial license. Always assume you don't have the rights unless the terms of service clearly state that you do.
Protecting Yourself and Your Business
The legal landscape around AI and copyright is still taking shape, but a few simple precautions can protect you from potential trouble. Before committing to any subscription, hunt down the platform's terms. You're looking for a clear, unambiguous statement that assigns you ownership or a comprehensive commercial license for the images you create.
Most reputable platforms, especially those targeting professionals, make their licensing terms obvious on their pricing or FAQ pages. If you have to dig through pages of legalese to find this information, that’s a major red flag.
By prioritizing platforms with transparent policies, you can confidently generate images with AI for all your business needs without constantly looking over your shoulder.
Common Questions About Generating Images With AI
Jumping into the world of AI image generation opens up a ton of questions, especially when you start thinking about using these visuals for professional projects. From legal rights to creative consistency, getting clear answers is the key to using this technology confidently and effectively. We’ve rounded up some of the most common questions creators have when they first get started.
Can I Legally Use AI-Generated Images for My Business?
Yes, but this is one area where you absolutely have to read the fine print. Your right to use an AI-generated image for commercial purposes—like in ads, on merchandise, or for client work—depends entirely on the terms of service of the tool you use.
Many platforms, especially on their paid tiers, grant users full commercial rights to the images they create. This is the green light you need for business use. Free versions, on the other hand, often come with significant restrictions, limiting you to personal or non-commercial projects only.
Always assume you do not have commercial rights unless the platform's licensing agreement explicitly says you do. Any reputable tool will make its commercial use policy clear and easy to find on its pricing or terms page.
How Do I Get More Consistent AI Image Results?
Consistency is the secret to building a strong visual brand with AI. It really comes down to two key techniques: super-detailed prompting and using a seed number.
A seed is just a unique starting point for the generation process. If your tool allows it, reusing the same seed with the exact same prompt will produce a remarkably similar image every single time. This is invaluable for creating a series of visuals that feel cohesive.
For character consistency, the magic is all in the details. Think of it like creating a "character sheet" right in your prompt that describes specific, recurring features. For example:
- Prompt Snippet: "A confident female entrepreneur with short, silver-blue hair, wearing minimalist gold hoop earrings and a charcoal gray blazer..."
By using this exact description across different scenes and prompts, you can keep your character looking like themselves, which is a game-changer for brand storytelling.
What Is the Difference Between Inpainting and Outpainting?
These are two of the most powerful editing features you'll find, and they solve completely different problems.
Inpainting lets you make surgical edits inside an existing image. You can mask a specific area—like a person's shirt or an object on a table—and use a new prompt to regenerate only that selected part. It’s perfect for fixing small errors or swapping out elements without having to start over from scratch.
Outpainting, which is often called "uncropping," does the exact opposite. It extends your image's canvas outward, intelligently generating new content beyond the original borders. This is incredibly useful for changing an image’s aspect ratio—turning a square Instagram post into a wide website banner, for example.
Are AI Image Generators Difficult to Learn?
Not at all, especially with the user-friendly platforms available today. The core process couldn't be simpler: you type a text description of what you want to see, and the AI creates it. The barrier to entry is virtually nonexistent.
While mastering the art of crafting complex, multi-layered prompts definitely takes practice and a bit of creative exploration, you don't need any prior design or technical skills to get started. The learning curve is focused more on discovering what kinds of descriptions yield the best results rather than figuring out complicated software. You can start generating high-quality images in seconds.
Ready to stop searching for the right image and start creating it? With ai-media-studio, you can generate professional-quality, commercially licensed images in seconds. Try it for free today and bring your vision to life.